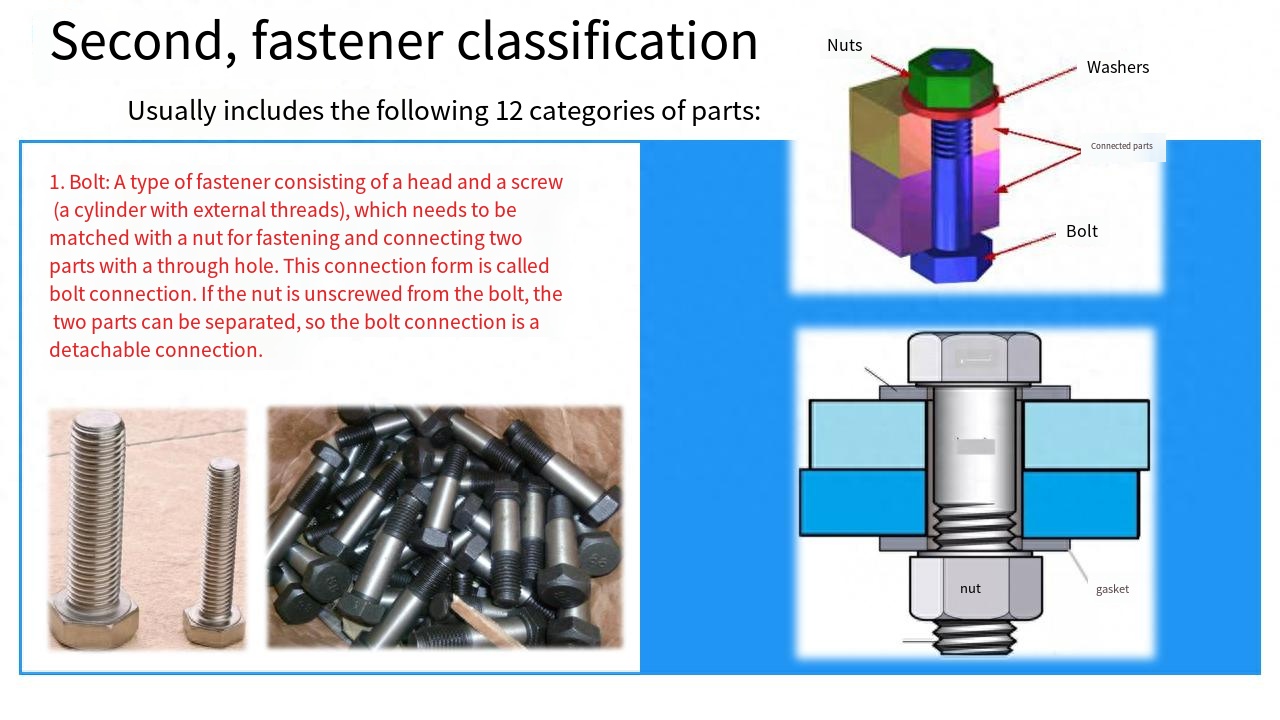
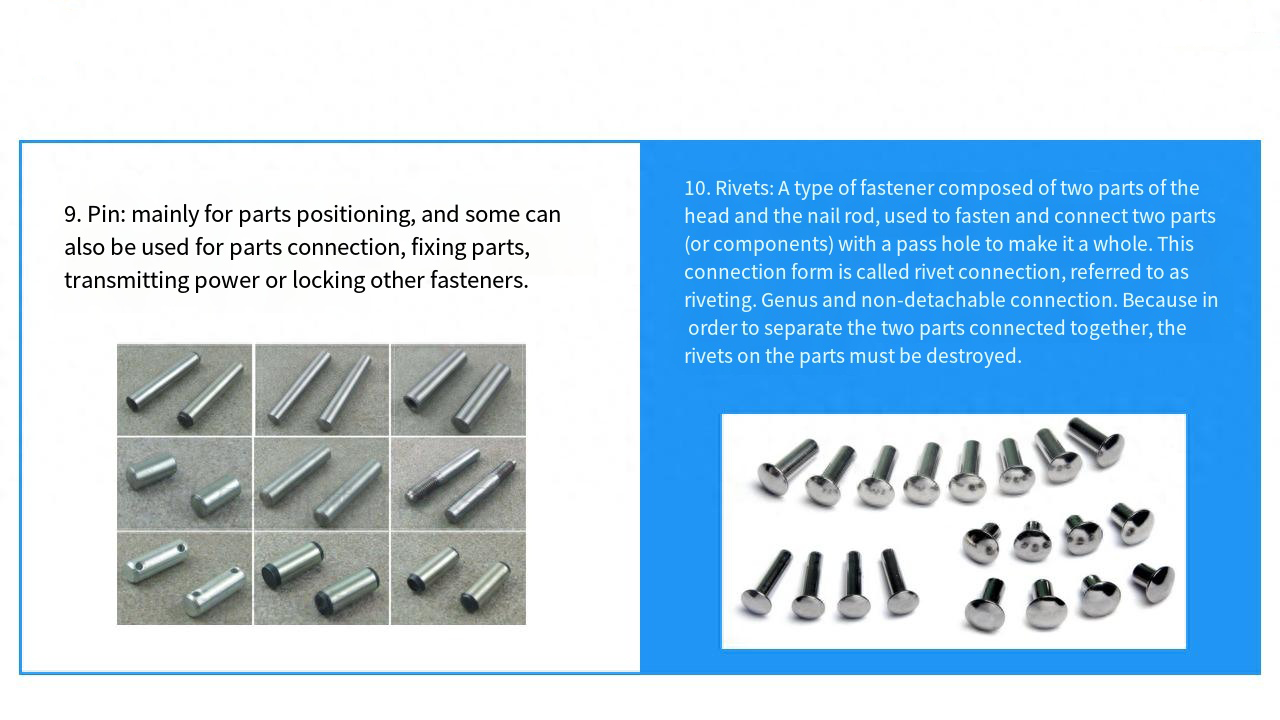
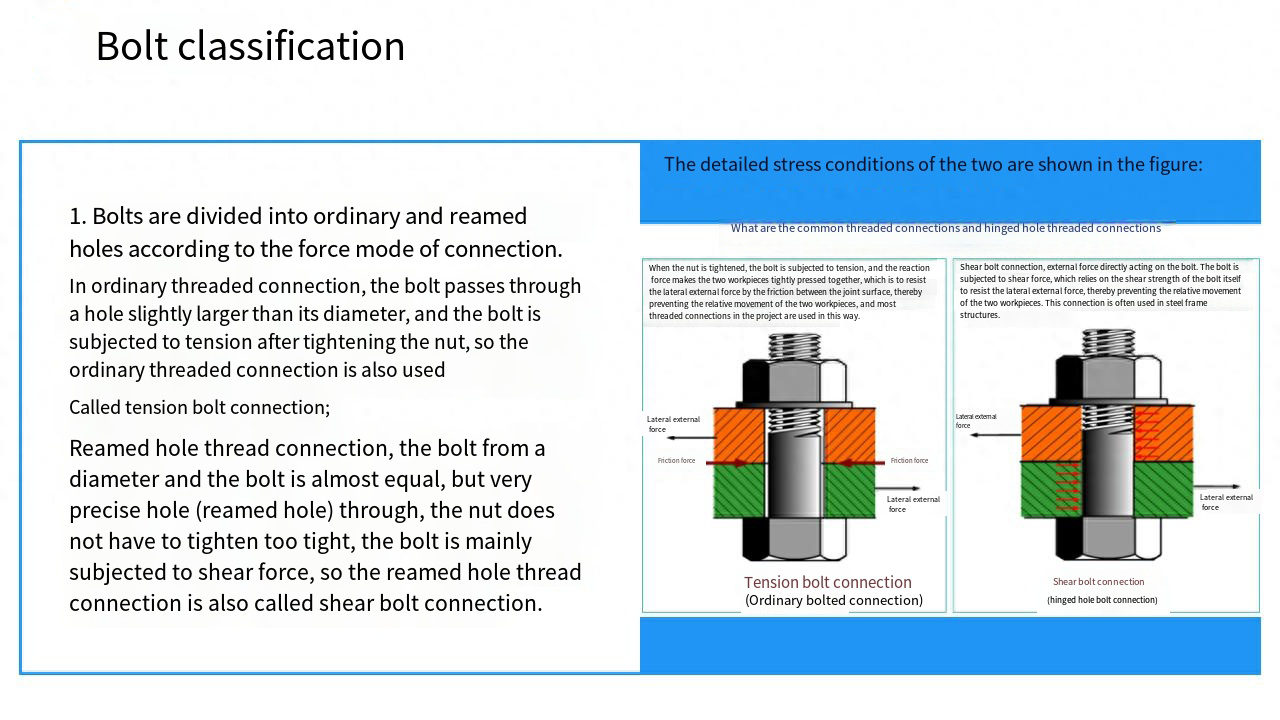
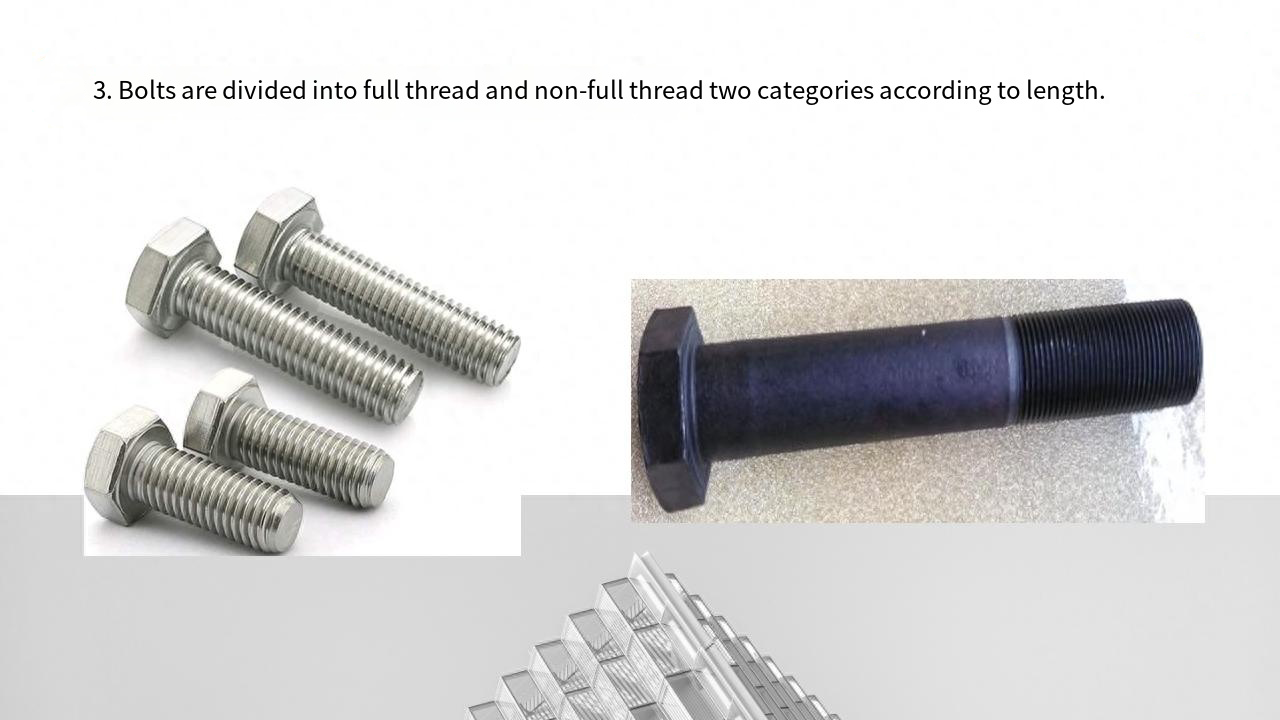
It can not be said that ordinary thread and reamed hole thread, but ordinary bolt and reamed hole bolt, because the thread part of the two is the same, the difference is that the part of the rod without thread. Because the thread part is the same, the axial force is the same. There is a gap between the plain rod part of the ordinary bolt and the hole, and the transverse force is only the point of friction on the contact surface when the bolt is tightened (of course, if you really consider cutting off, the transverse force is actually the shear strength of the bolt). The fit of the reamed hole bolt with the hole is tolerance, and the transverse force is the shear strength of the reamed hole bolt.
Look out
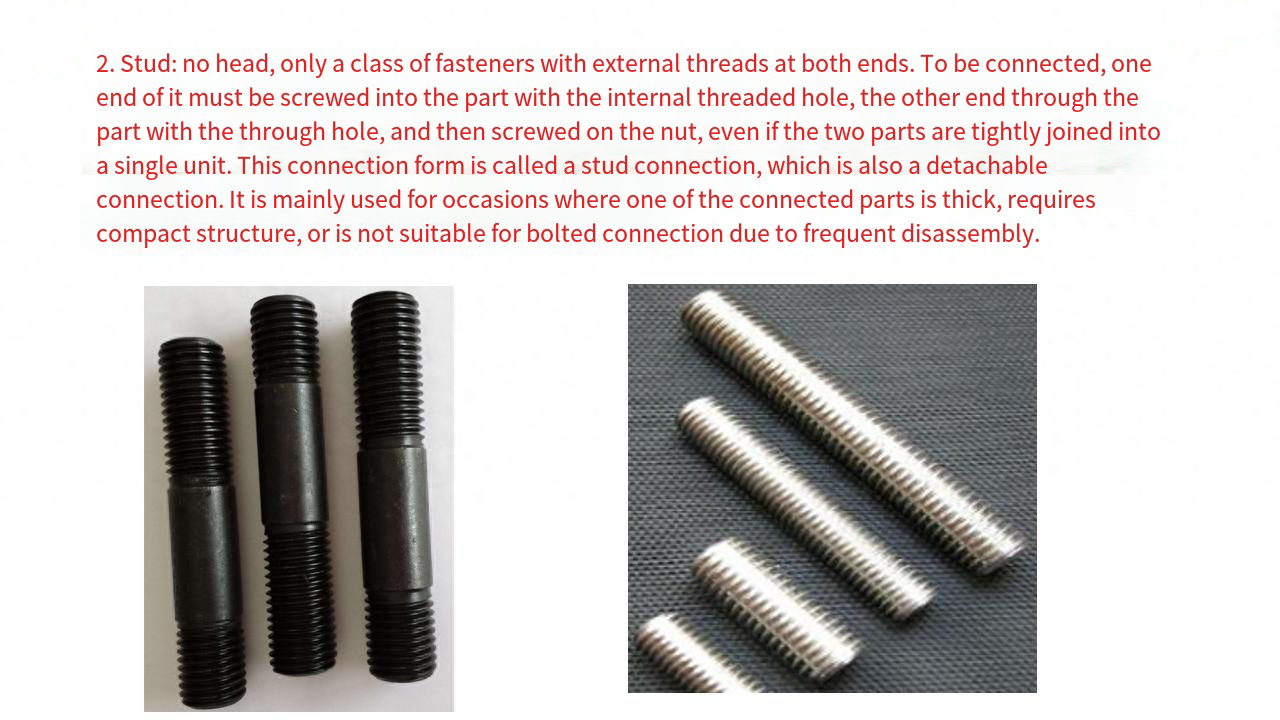
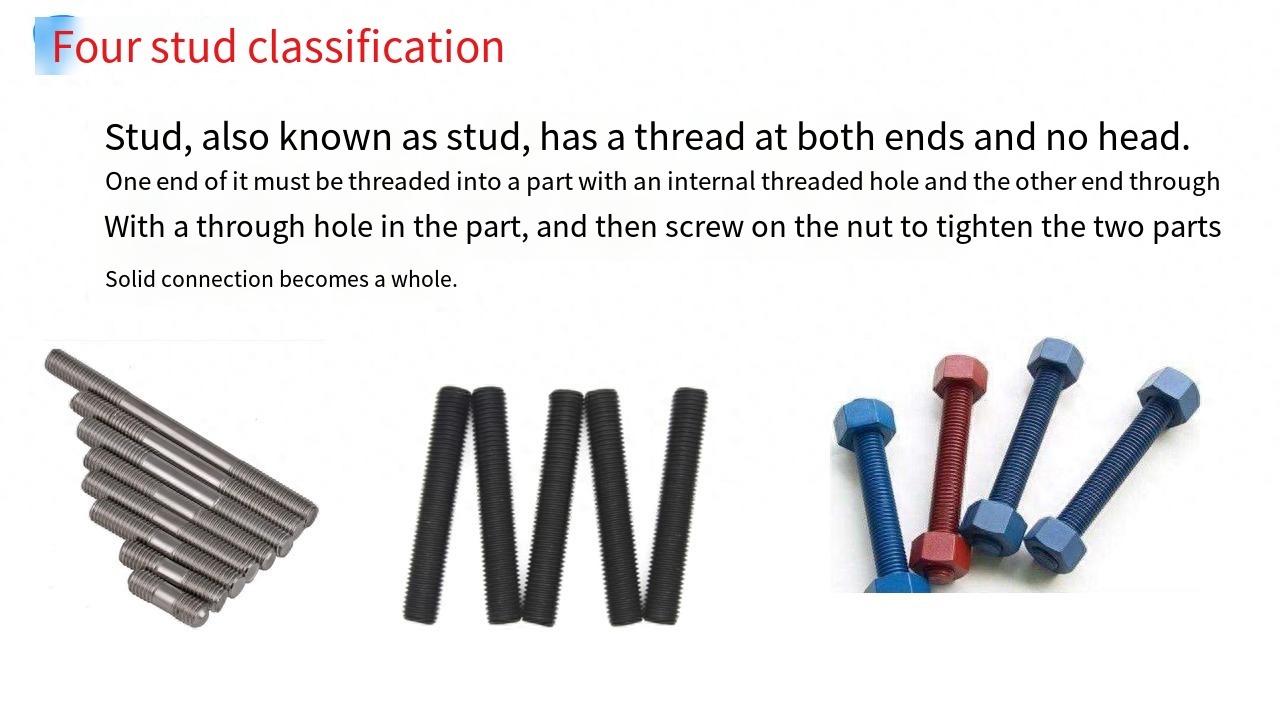
bm=1d double stud is generally used for the connection between two steel connected parts; GB/T897-1988 “Double-ended stud bm=1d” (bm refers to the end of the screw hole called the screw end, the length of bm is related to the material of the part to be screwed: bm=1d for steel and bronze, where d refers to the outside diameter of the thread, referring to the large diameter.)
bm=1.25d and bm=1.5d double stud is generally used for the connection between the cast iron connector and the steel connector; GB898-1988 “Double stud bm= 1.25d”, GB899-1988 “Double stud bm=1.5d”.
bm =2d double stud is generally used for the connection between the aluminum alloy connector and the steel connector. The former connector is provided with an internal threaded hole, and the latter with a through hole. GB/T900-1988 “Double stud bm =2d”.
The threads at both ends of the equal-length double-ended stud must be matched with nuts and washers for two connected parts with through holes.GB/T901-1988 “Equal length double stud Class B”, GB/T953-1988 “Equal length double stud Class C”. One end of the welding stud is welded to the surface of the connected part, and the other end (threaded end) passes through the connected part with a pass hole, and then the washer is put on, and the nut is screwed on, so that the two connected parts are connected as a whole. GB/T902.1 “Welding stud for manual welding”, GB/T902.2 “Welding stud for arc stud welding”, GB/T902.3 “Welding stud for energy storage welding”, GB/T902.4 “Welding stud for short period ard stud welding”.
Attention:
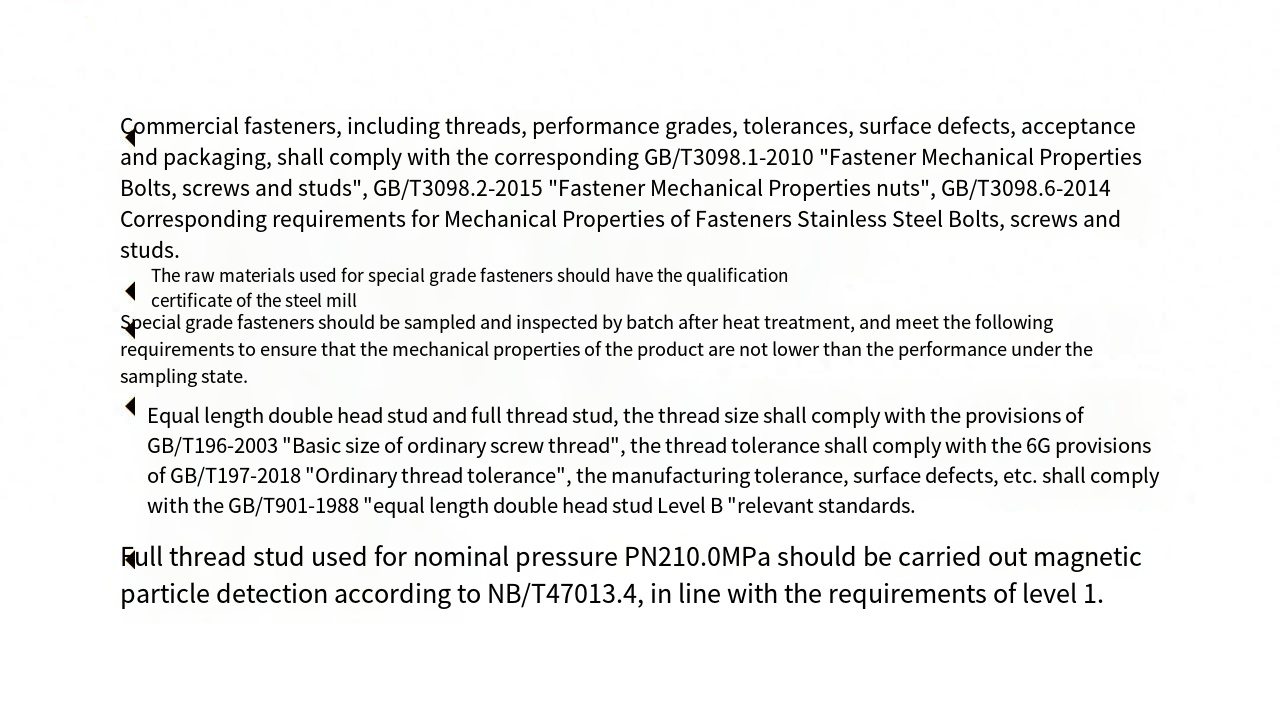
The thread used on the double thread (GB/T897-900) is generally coarse ordinary thread, and the fine ordinary thread or the transition fit thread can also be used according to the need (according to GB1167/T-1996 “transition fit thread”). Equal length double head stud -B grade, can be used according to need30Cr, 40Cr, 30CrMnSi, 35CrMoA40MnA or 40B material manufacturing, its performance according to the agreement between the supply and demand parties.Welding stud material chemical composition, according to GB/T3098.1-2010 provisions, but its maximum carbon content should not be greater than0.20%, and shall not be made of free cutting steel.
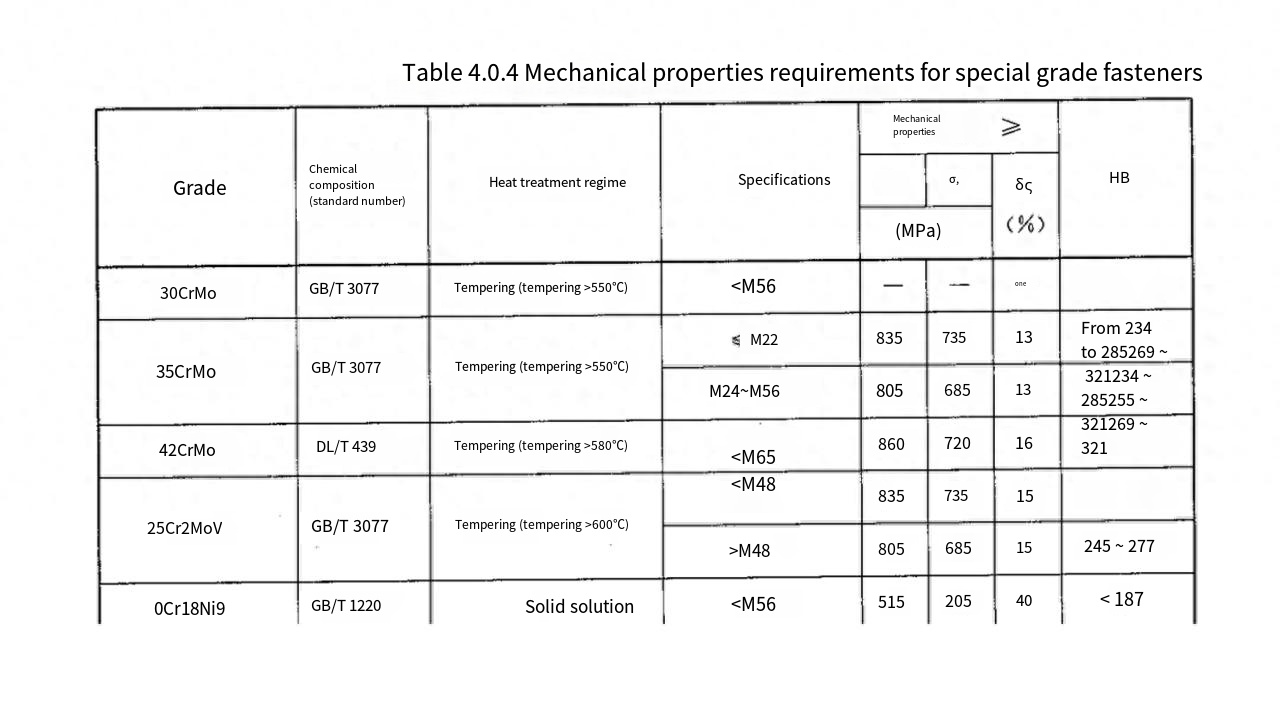
6. Hardness: The ability of the material to resist local hard objects pressed into its surface is a performance indicator tomeasure the degree of softness and hardness of metal materials. Test means-hardness test (Brinell, Rockwell, Vickers)Sample preparation requirements: The two ends of the sample are parallel, the surface is flat, and no oil or oxide is allowed
Test environment 10~35°
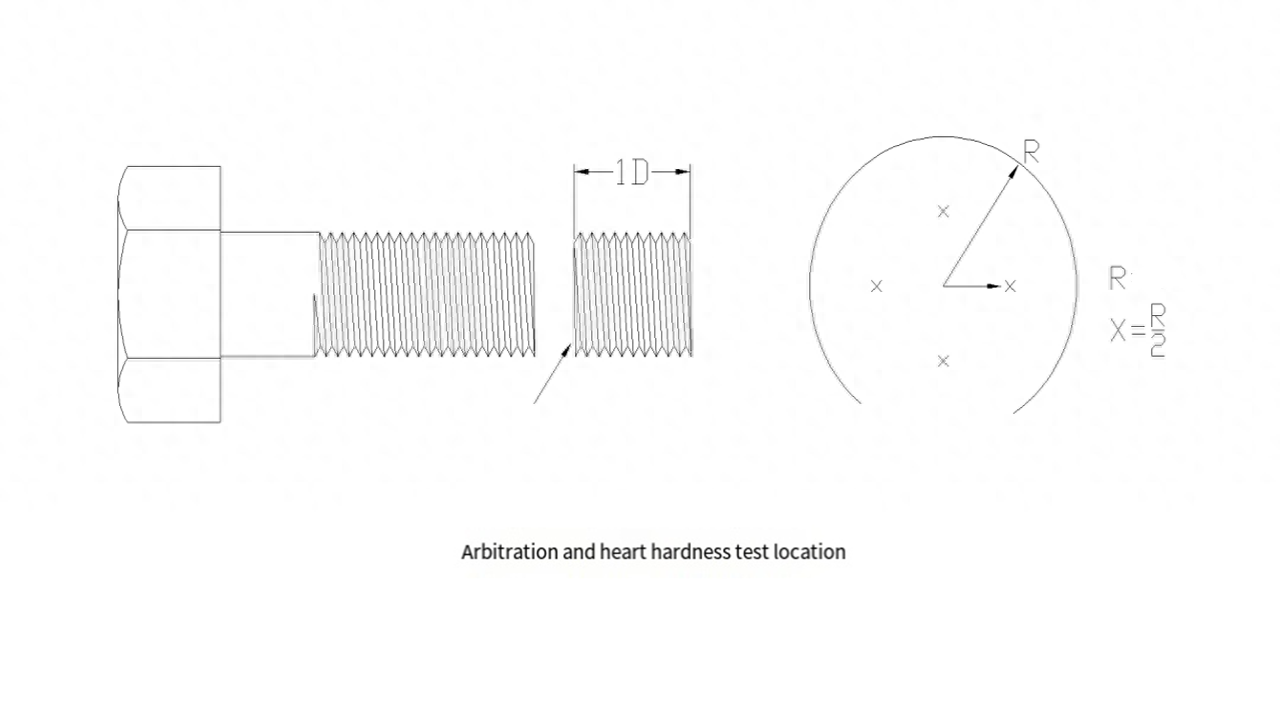
In the detection of bolt hardness, no heat treatment of bolts, only need to do the surface hardness, within the qualified ange on the line. If it is a heat treatment bolt, it is necessary to cut the hardness on the surface of a diameter at the end. The test position is shown in the figure. The hardness test is at 1/2R on the surface, and the hardness meets the standard.
Bolt hardness has a surface and a core, the surface refers to the use of Vickers or surface Rockwell hardness after removing the surface rust, etc. The core should be in the removal of the head 1/2 diameter long part in the surface and core 1/2 place to play hardness, the difference between the two hardness can not exceed 30HV, the surface is higher than 30HV indicating that the surface carburizing, is not allowed, If the surface is lower than 30HV, it means that the surface is decarbonized, and it is not allowed.
The general 8-grade nut is to be heat treated, but there are not heat treated, the ordinary 8-grade nut is generally made of 35 steel, the hardness test is also specified, the general surface is not required, the heat treatment manufacturer tests the hardness after heat treatment, the metric nut is generally broken from the middle to test the hardness of its heart, the inch nut is generally broken on one of the faces (that is, cut two knives on a surface), test the hardness of the middle of the section of one surface, and small nuts are generally worn off the section 0.2~Test the hardness after 0.3mm.4.6~6.8 bolts do not need heat treatment; Bracketed for high nut type 2.
The national standard GB3098.1 and the national standard GB3098.3 stipulate that the arbitration hardness is measured at 1/2 radiusof the cross section of the part. In case of any dispute during acceptance, Vickers hardness shall be used as arbitration test.At least 3 readings should be taken for each sample.
Arbitration test location: When reporting test results between the purchaser and the seller for arbitration purposes, the hardness test shall be measured at the central point (r/2) of the radius of the cut-off surface one diameter away from the end of the bolt or stud. If the product size permits, take 4 readings at the end of this bolt or stud. Smaller diameter products can also be tested using the parallel surface area of the bolt head terminal corresponding to the above cut-off surface. For routine testing, the hardness of bolts, screws or studs can be tested at the head, tail or shank after proper surface removal.
For all stages, if the test value exceeds the upper limit of hardness, the specimen should be removed from the position of a nominal diameter from the end of the specimen, and the center of the specimen and the thread path at the middle point of the test, the retest value should not exceed the upper limit of hardness, if in doubt, the Vickers hardness (HV) should be accepted as the decision. The surface hardness test can be located at the end of the product or the edge of the hexagon, and the test location should be minimally ground or polished to ensure the repeatability of the test and the true condition of the specimen surface. HV0.3 is used in the arbitration test of the surface hardness test. The surface hardness tested with HV0.3 shall be compared with the core hardness test value also tested with HVo.3, and the difference shall not exceed 30 HV hardness values. Surface hardness greater than core hardness 30 HV hardness values indicate that the specimen has been carburized. For products with grades 8.8 to 12.9, the difference between surface hardness and core hardness can be used to determine whether the product has carburizing on the surface. The hardness of the product is not directly related to the theoretical tensile strength. The determination of the maximum hardness value is not based on the consideration of the upper strength limit.
Note: It should be noted that the variation of hardness value increase is caused by heat treatment carburizing or cold working.
Post time: Sep-23-2023


