Chapter VII. Special representations in mechanical drawings
07.1 Thread
7.2 Thing method of the thread is stipulated
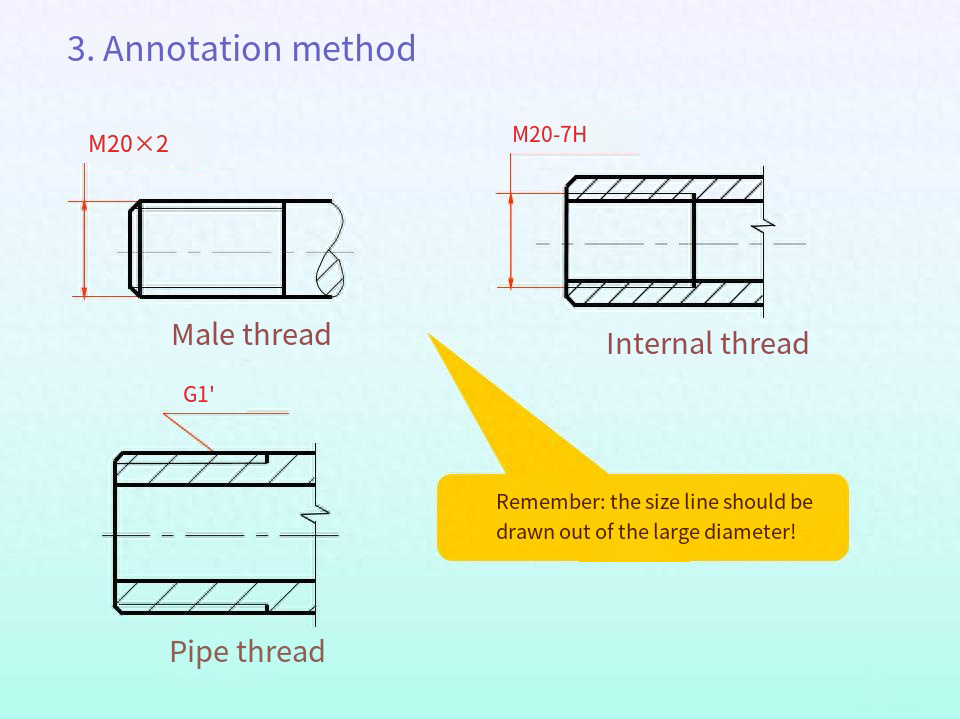
7.3 Method for marking thread
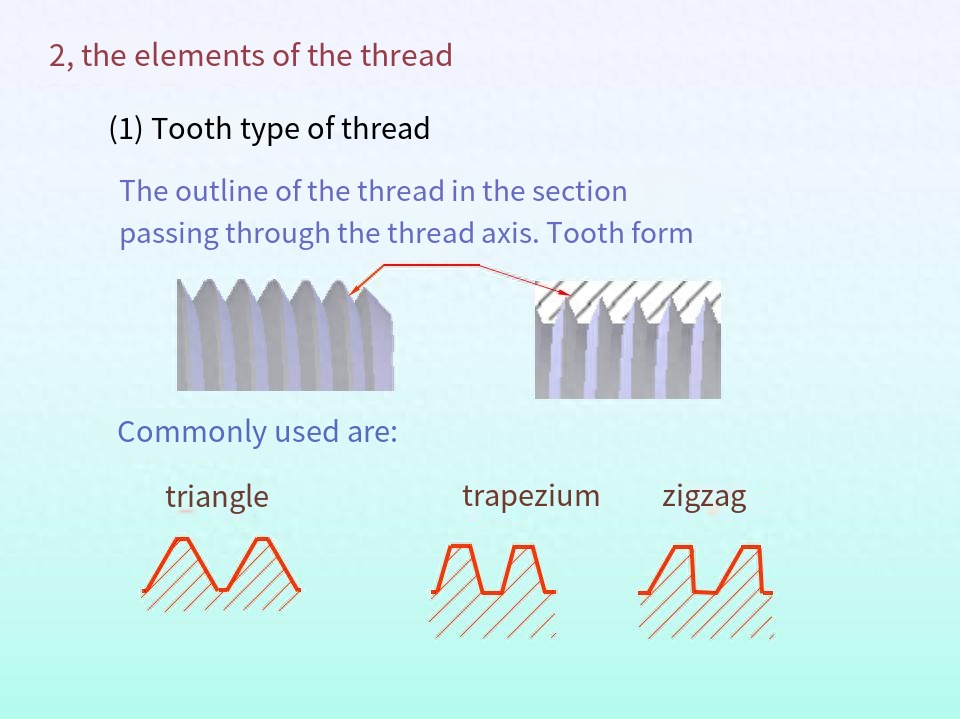
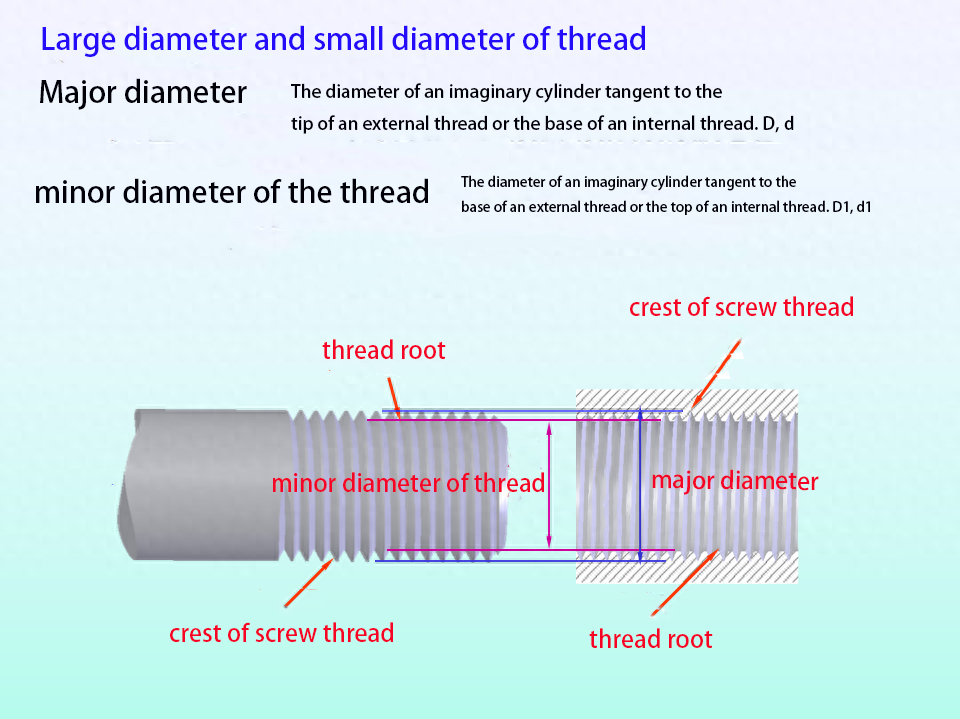
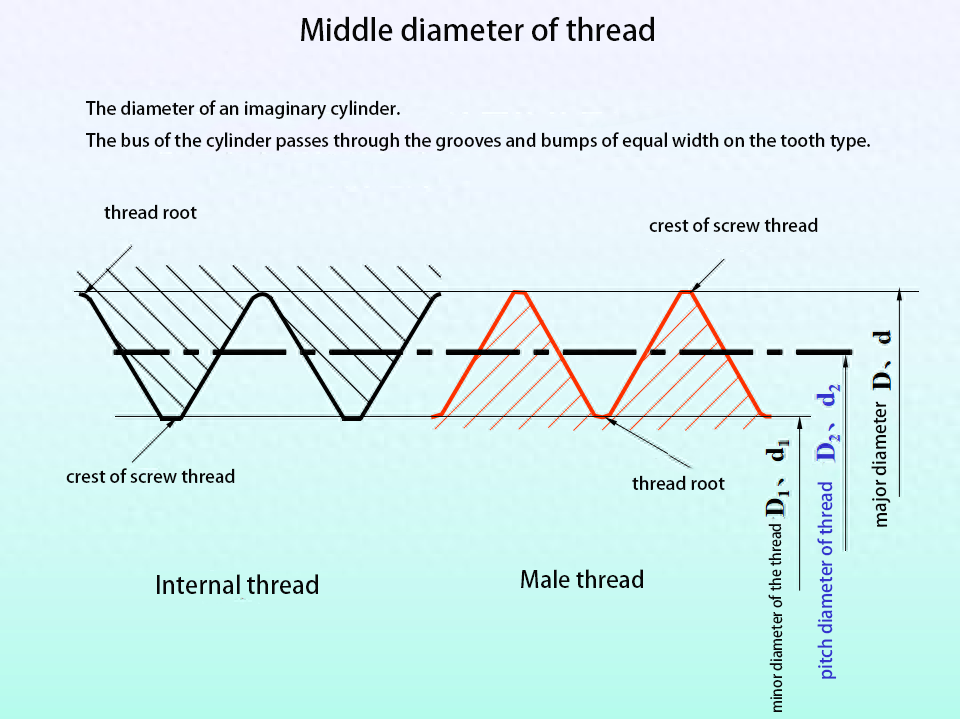
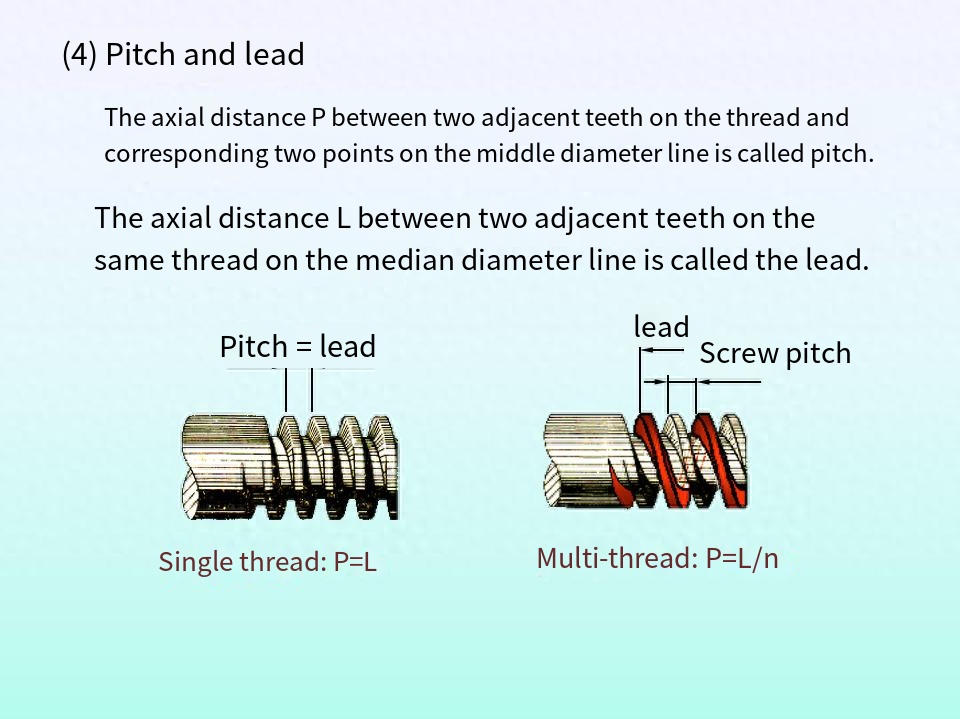
At present, various design fields are CAD download on the Internet, looking for a humanized, intelligent professional software, a variety of plug-ins are developed, a variety of skills are taught, in the official website of the CAD software download center can download professional design software, the following share a Yaowei painting method and annotation skills.(1) screw thread parameters① Tooth type: In the section through the thread axis, the contour shape of the thread is called the tooth type, and the Angle between the adjacent two teeth is called the tooth type Angle. Commonly used ordinary thread tooth type is triangle, tooth type Angle is 60°.② Large diameter, small diameter and middle diameter: large diameter refers to the diameter of the imaginary cylinder or cone that coincides with the tip of the external thread and the bottom of the internal thread, the large diameter of the external thread is represented by d, the large diameter of the internal thread is represented by D, and the small diameter refers to the diameter of the imaginary cylinder or cone that coincides with the bottom of the external thread and the top of the internal thread. The diameter of the external thread is expressed by di, the diameter of the internal thread is expressed by D1, between the large diameter and the diameter, it is assumed that there is a cylinder (or cone), in its axial profile, the width of the tooth and the width of the slot on the prime line are equal, then the diameter of the imaginary cylinder is called the middle diameter, expressed by d2(or D2).
7.2 Specified drawing method of thread
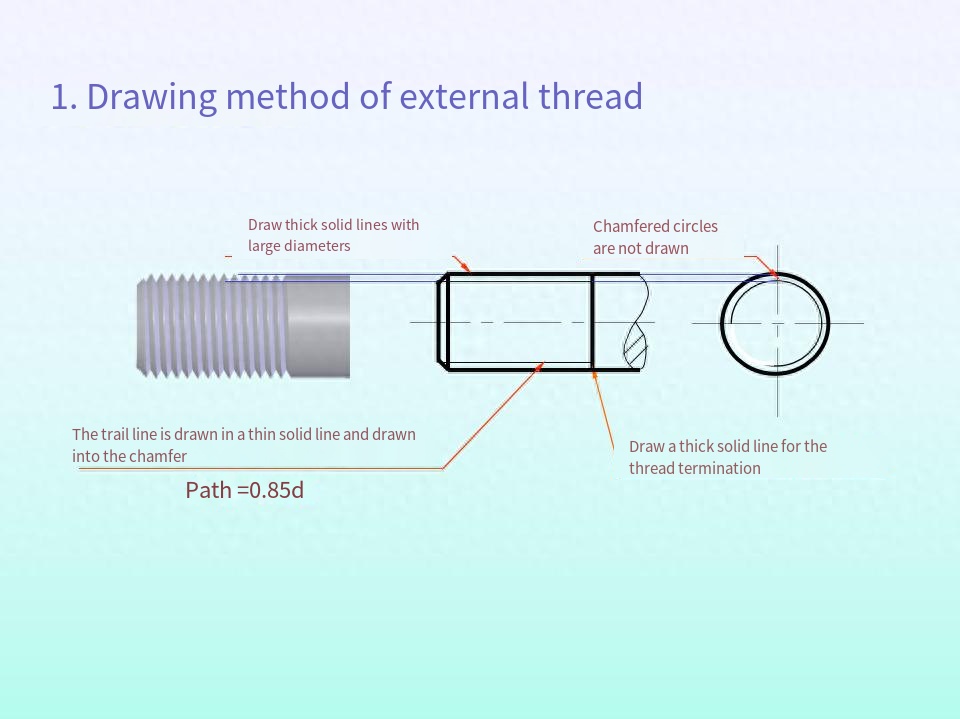
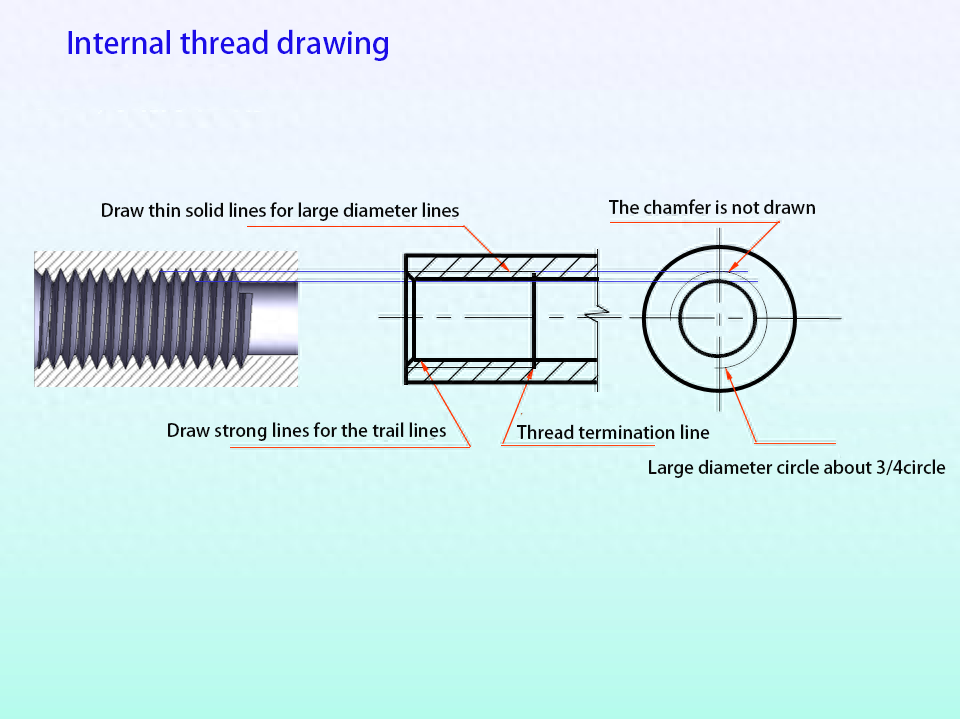
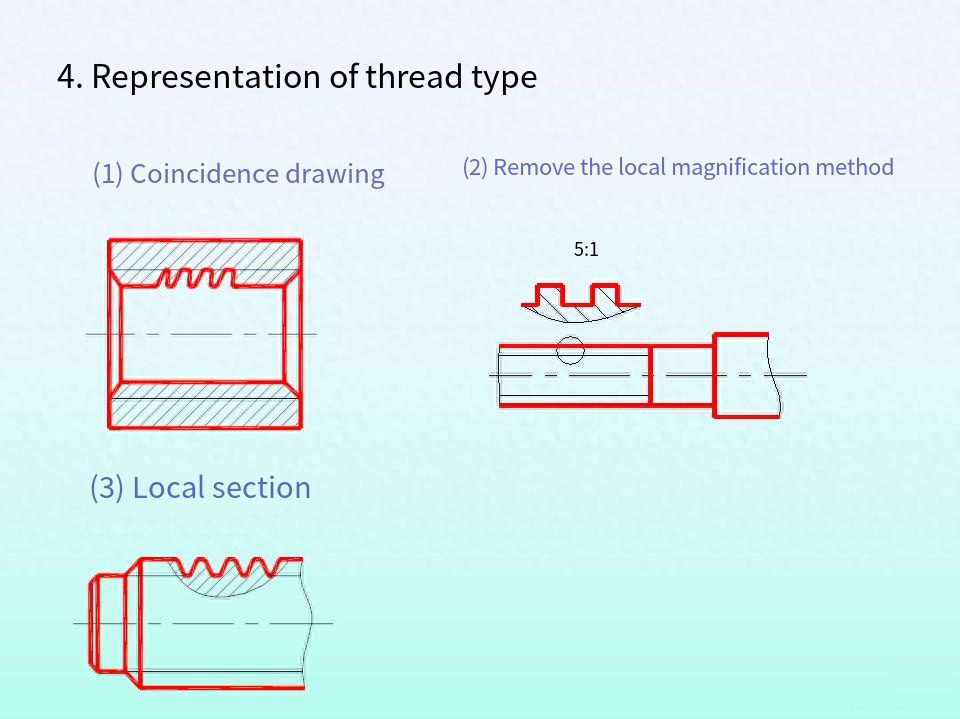
The top of the tooth is represented by a thick solid line (large diameter line of external thread, small diameter line of internal thread).
The tooth base is indicated by a thin solid line (small line of external thread, large diameter line of internal thread).
On a view projected as a circle, the thin solid line circle representing the tooth base is drawn only about 3/4 of a circle.
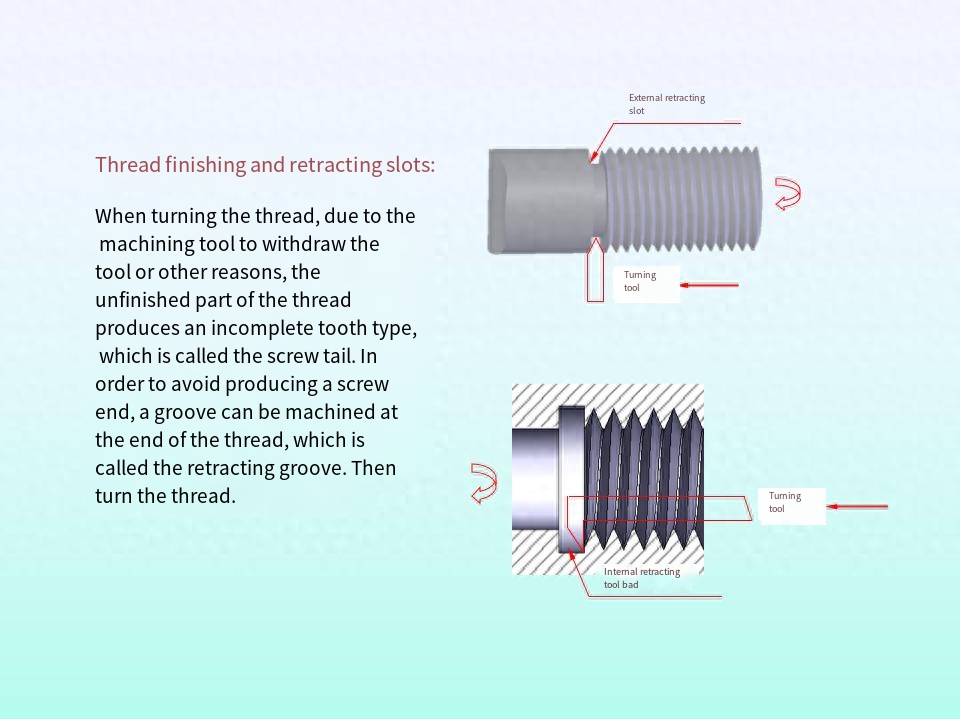
The thread termination line is represented by a thick solid line
Whether it is internal or external thread, the section line on the section view or cross-section must be drawn as a thick line
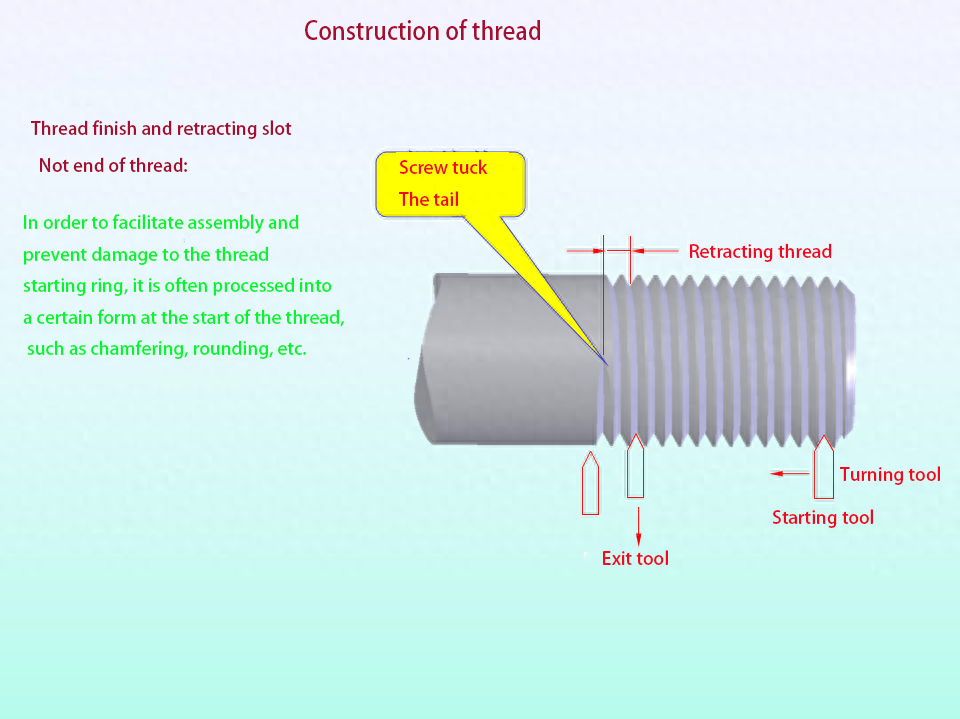
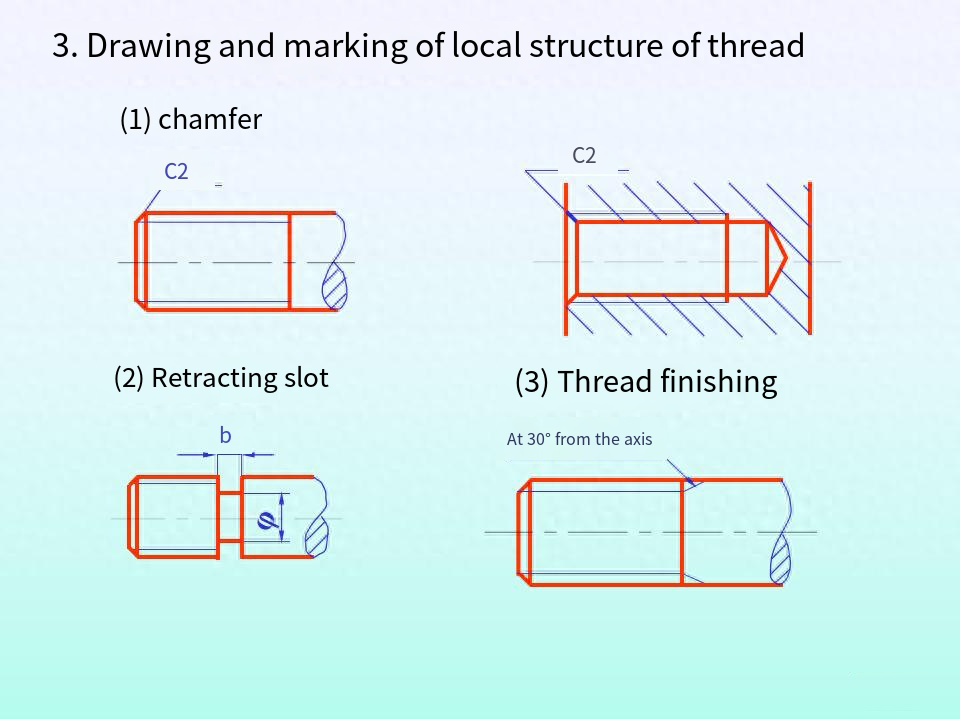
When it is necessary to indicate the end of the thread, the tooth line of the screw tail part is 30° from the axis.
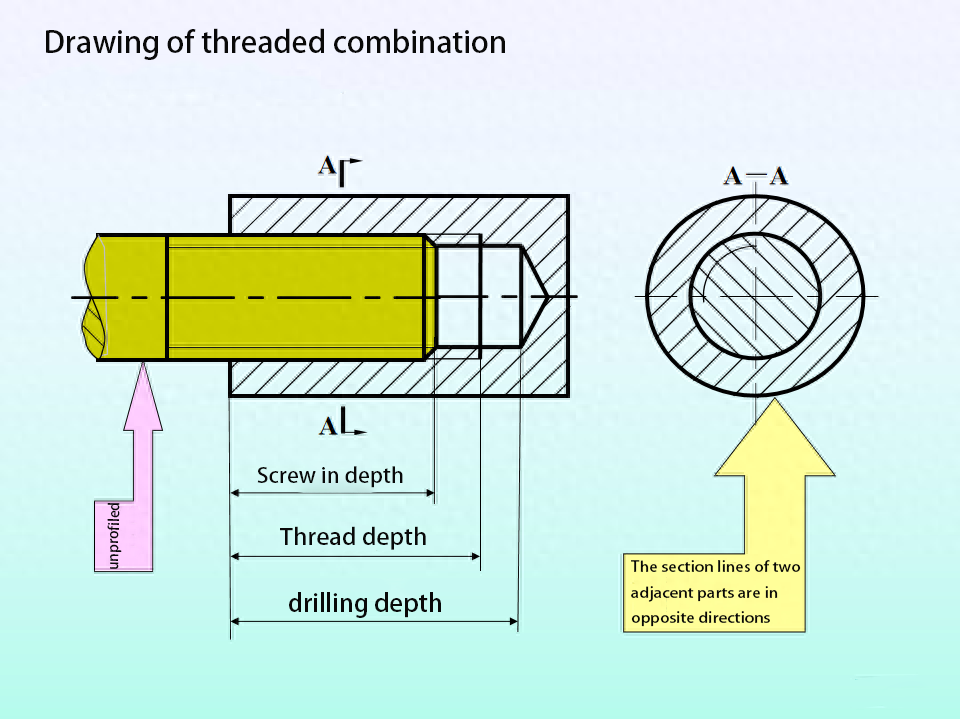
Key points of threaded combination drawing:
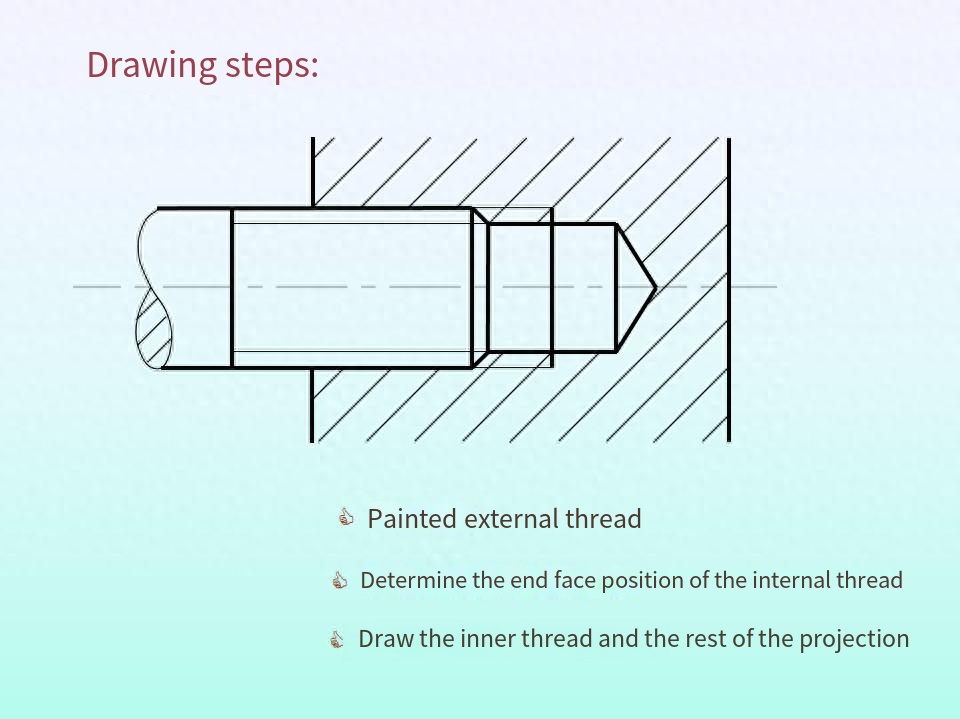
The external thread is aligned with the large diameter line and large diameter line of the internal thread; The trail line is aligned with the trail line.
Why?
The screwing part is drawn according toexternal thread; The rest are drawnaccording to their own regulations.
Post time: Sep-28-2023

