Tolerance and detection of threadbonding
The purpose of this chapter is to understand the characteristics of common thread interchangeability and the application of tolerance standards. The learning requirement is to understand the influence of the main geometric errors of common thread on the interchangeability; Establish the concept of thread action diameter; By analyzing the distribution of thread tolerance zone, master the characteristics of common thread tolerance and fit and the selection of thread accuracy; Understand the factors that affect the displacement accuracy of machine screw.
Type of thread and use requirements
1, ordinary thread
Usually called fastening thread, it is mainly used for connecting and fastening various mechanical parts. The requirements for the use of this type of threaded connection are screwability (easy assembly and disassembly) and reliability of the connection.
2. Drive thread
This type of thread is usually used to transmit motion or power. The use of threaded connections requires the reliability of the transmitted power or the accuracy of the transmitted displacement.
3. Tight thread
This type of thread is used for sealing joints. The use of thread requirements are tight, no water leakage, no air leakage and no oil leakage.
Dispute handling
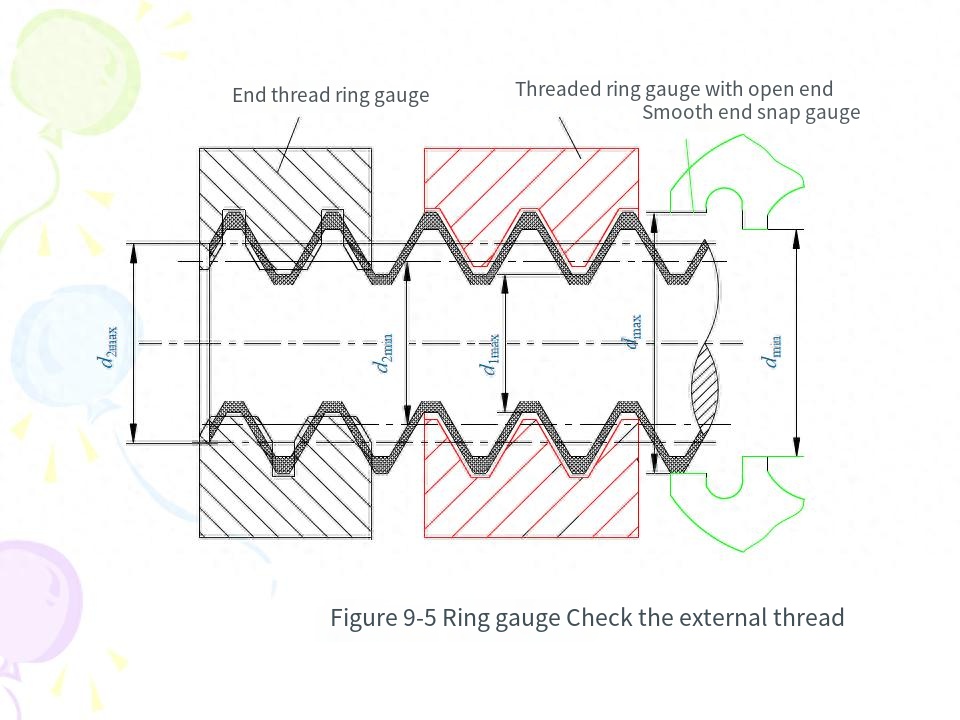
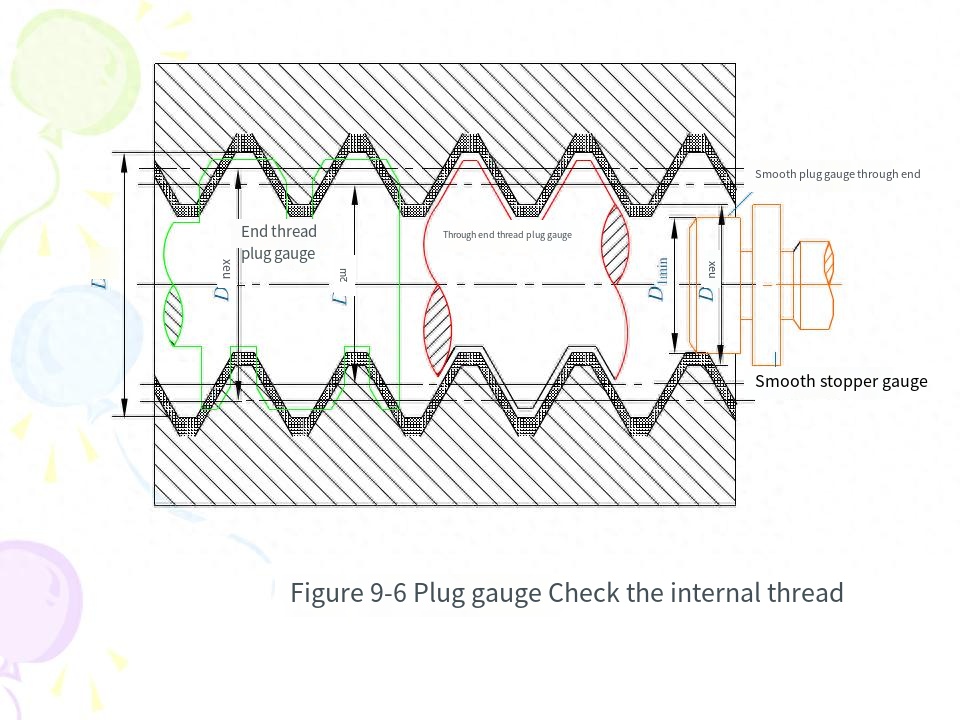
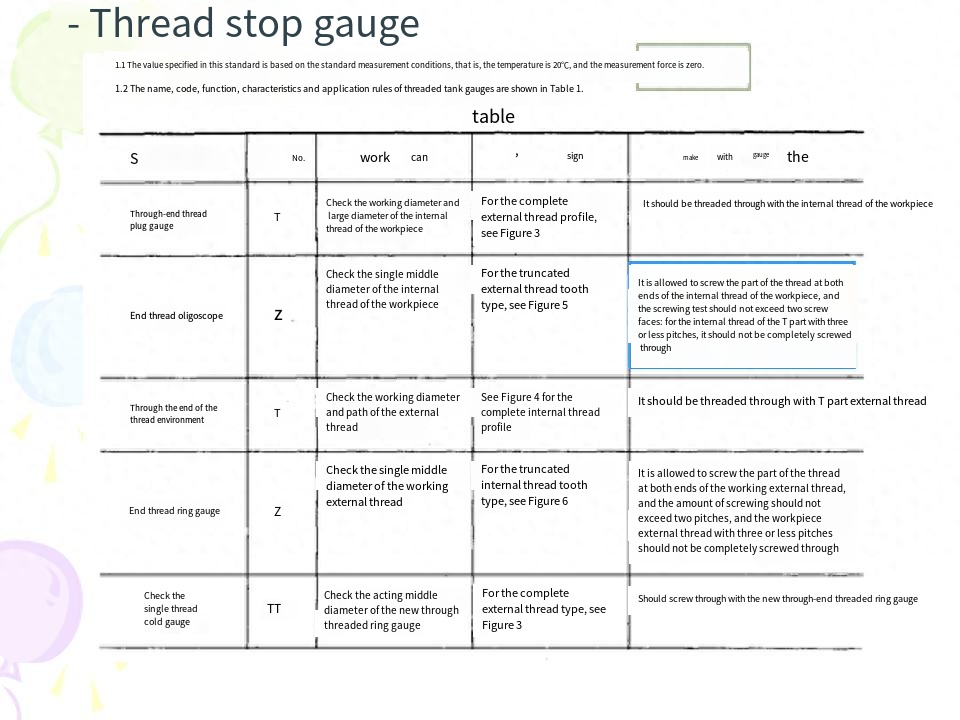
An external thread that meets the corresponding rules of use in Table 1 when tested with the through-end thread ring gauge and the through-end thread ring gauge of this standard, and meets the corresponding rules of use in Table Al when tested with the through-end smooth ring gauge (or snap gauge) and the through-end smooth snap gauge (or ring gauge) of this standard, is judged to be qualified.An internal thread that complies with the corresponding rules of use in Table 1 when tested with the through-end plug gauge and the stop-end plug gauge of this standard and the corresponding rules of use in Table Al when tested with the through-end smooth plug gauge and the through-end smooth plug gauge of Appendix A of this standard is deemed to be qualified.T.5 In orderto reduce disputes during inspection, the operator shall use new or less worn through-end thread gauges and more worn or close to the wear limit in the process of manufacturing workpiece threads. The inspection department or the user representative shall use the through-end thread gauge with more wear or close to the wear limit and the new or less wear stop-end thread gauge when accepting T thread.1.6 In the event of a dispute during the inspection, if the thread gauge that determines the workpiece thread to be qualified is in accordance with the provisions of this standard, the workpiece thread shall be treated as qualified.
Single measurement
For large size ordinary threads, precision threads and drive threads, in addition to the rotability and reliability of the connection, there are other accuracy and functional requirements, and a single measurement is generally used in production.
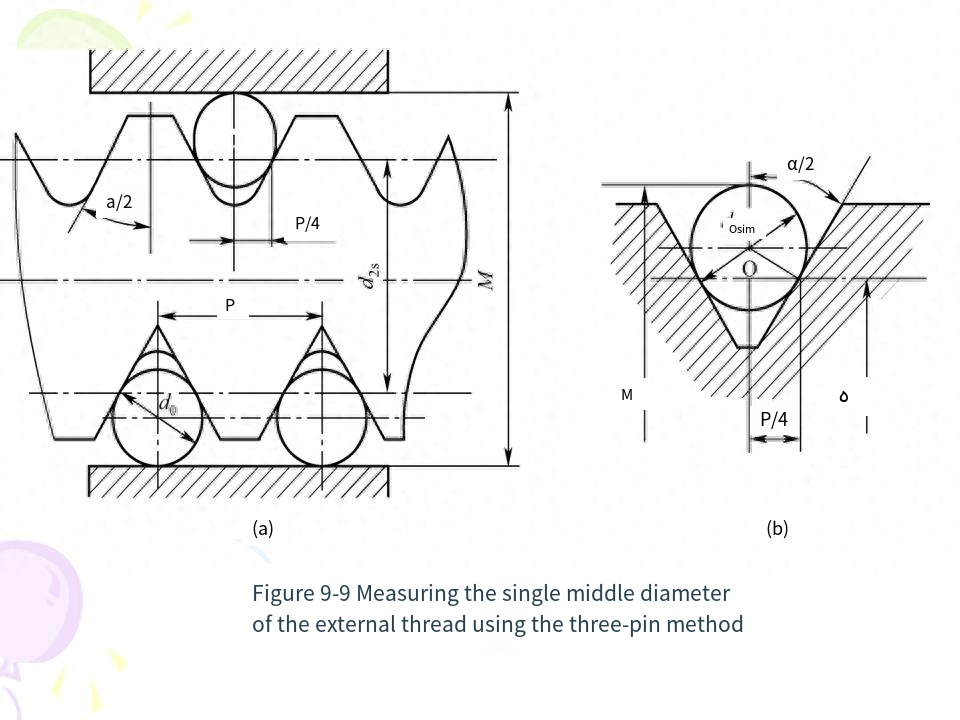
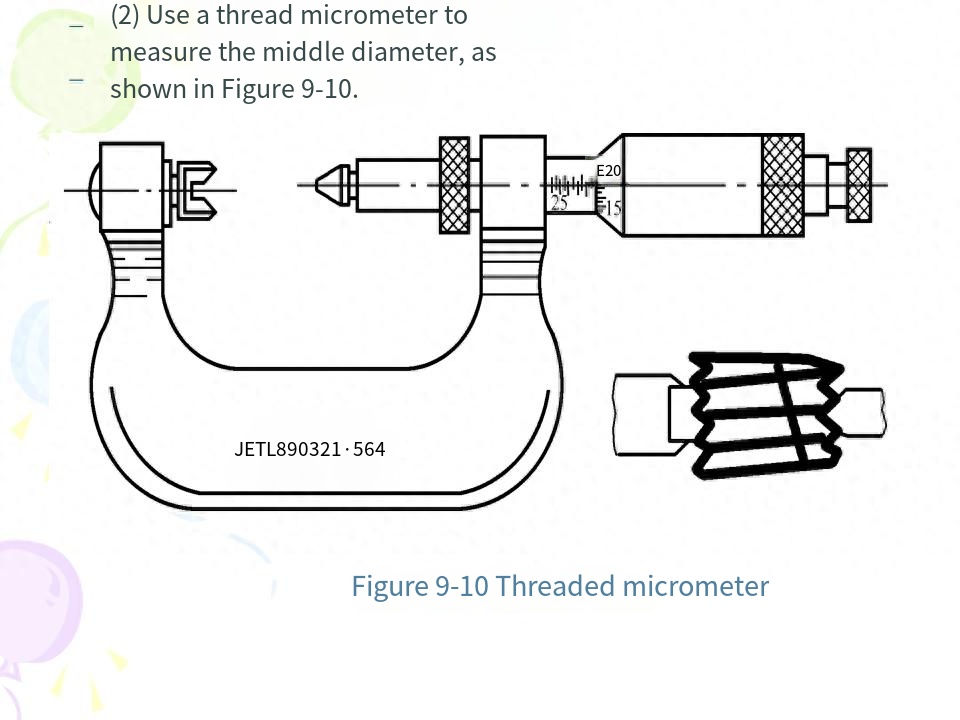
There are many methods for single measurement of thread, the most typical one is to use the universal tool microscope to measure the diameter, pitch and half Angle of thread. The tool microscope is used to enlarge the profile of the measured thread and measure its pitch, half Angle and middle diameter according to the image of the measured thread, so the method is also called image method.
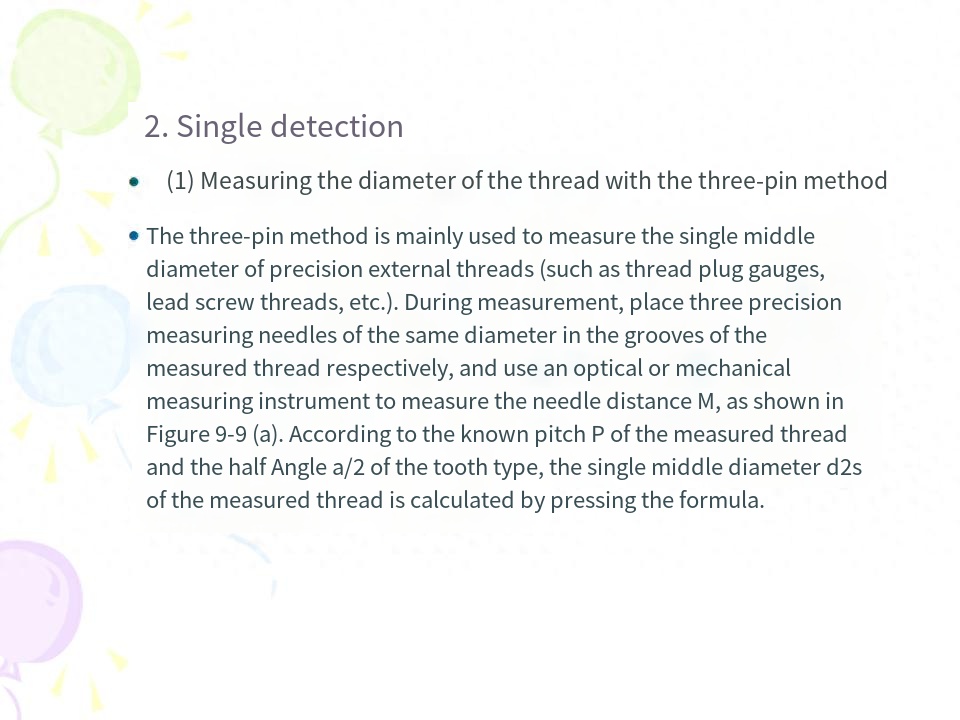
In actual production, the three-pin measuring method is used to measure the middle diameter of external thread. This method is simple, high measuring precision and widely used
Brief summary
1. Common thread
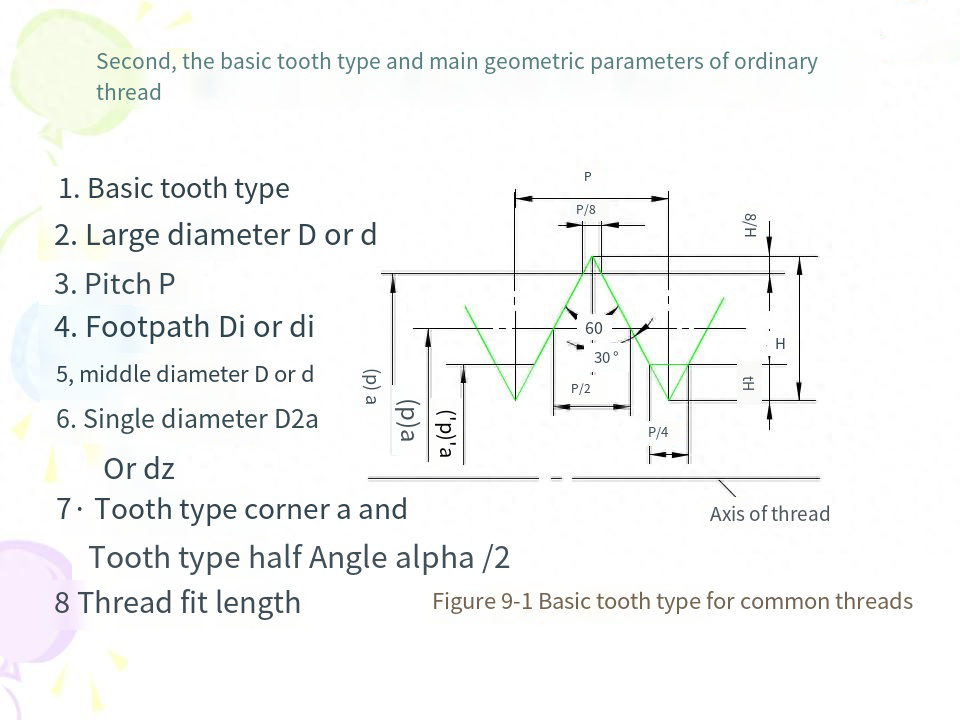
(1) The main terms and geometric parameters of ordinary threads are: basic tooth type, large diameter (D, d), small diameter (D1, d1), middle diameter (D2, d2), active middle diameter, single middle diameter (D2a, d2a) actual middle diameter, pitch (P), tooth type Angle (a) and tooth type half Angle (a/2), and screw length.
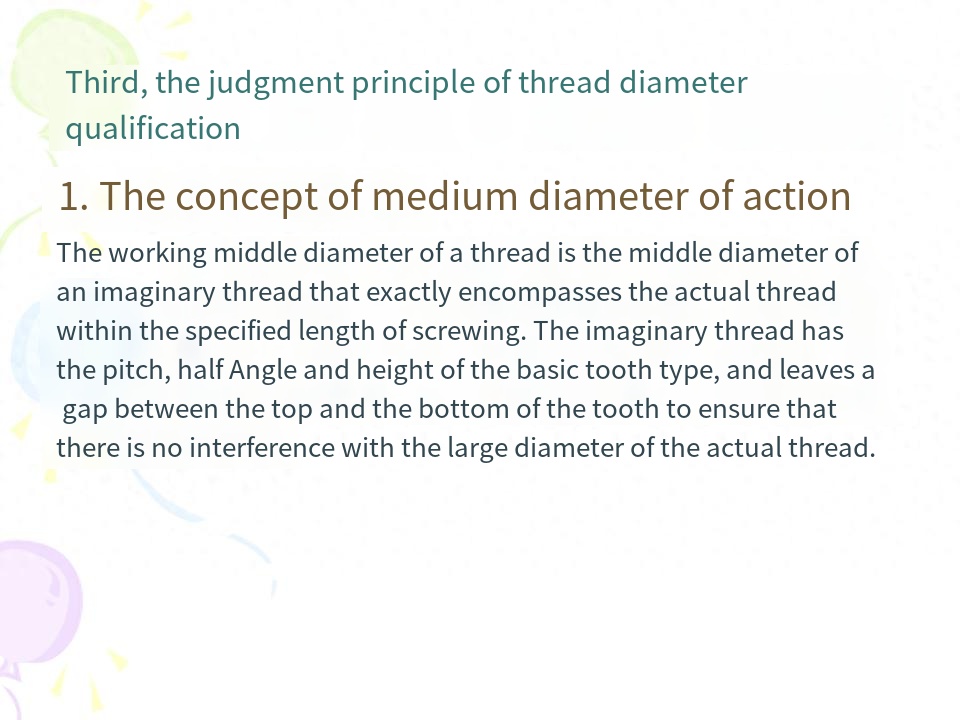
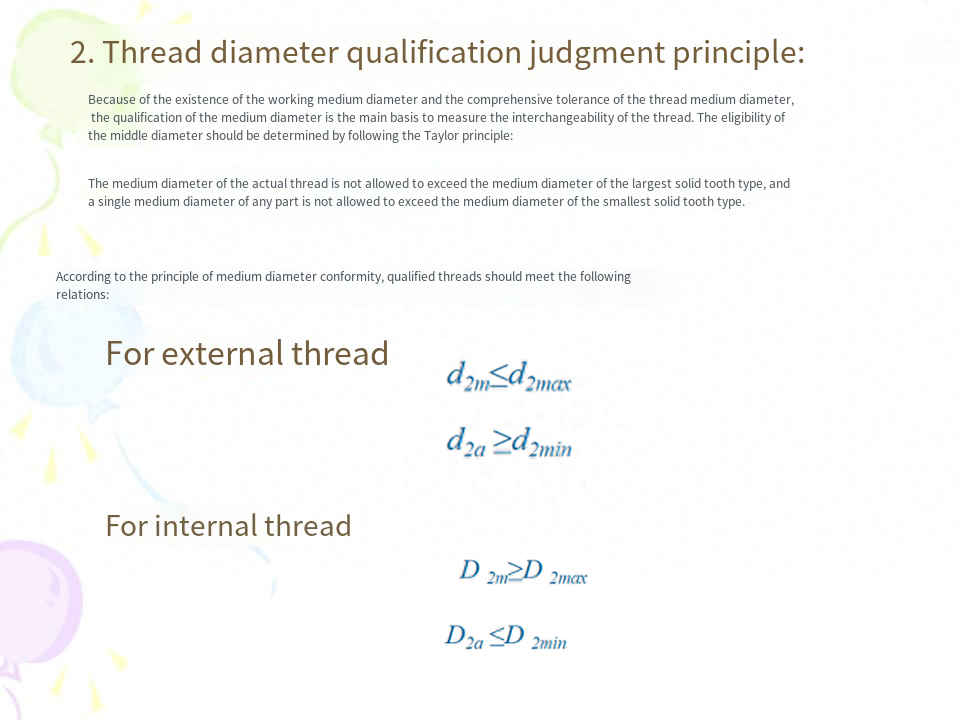
(2) The concept of the medium diameter of the action and the qualifying conditions of the medium diameterThe size of the active medium diameter affects the spinability, and the size of the actual medium diameter affects the reliability of the connection. Whether the medium diameter is qualified or not should follow the Taylor principle, and both the actual medium diameter and the active medium diameter are controlled within the tolerance zone of the medium diameter.
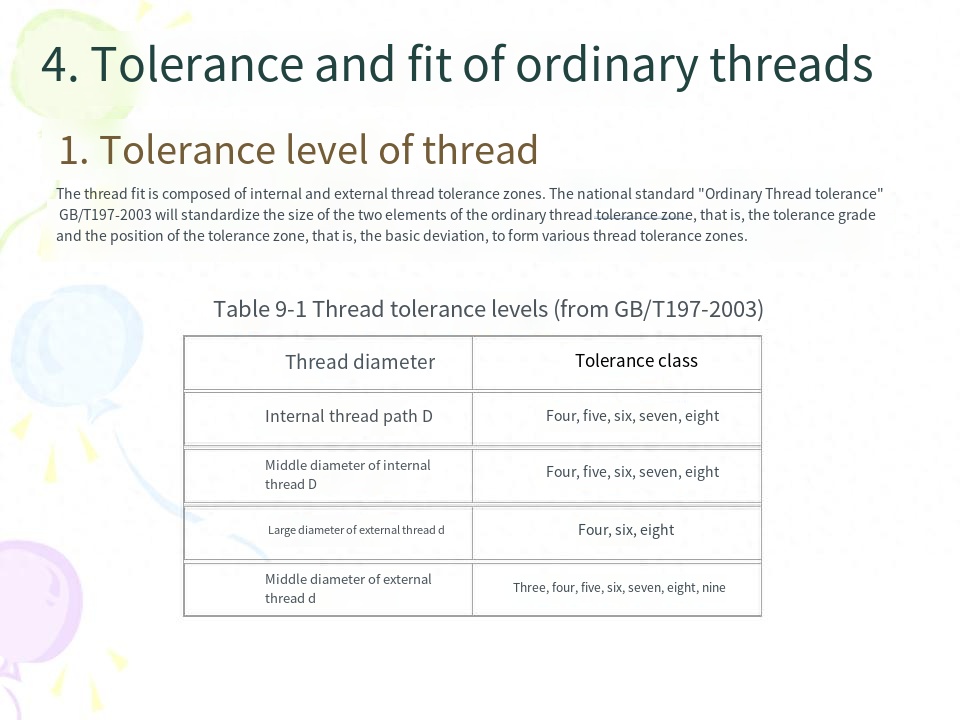
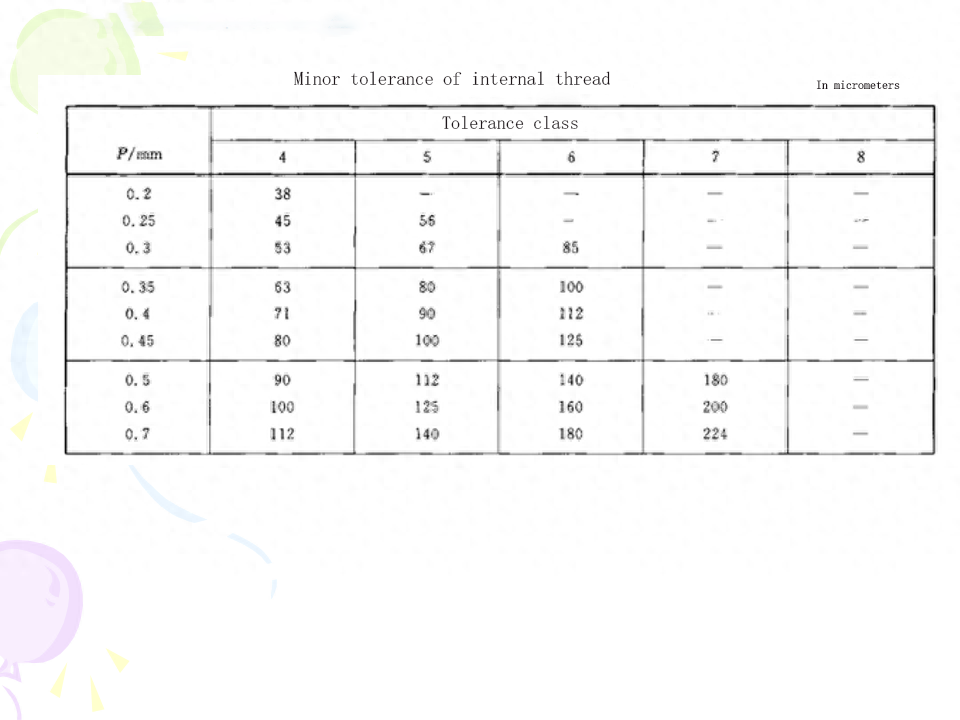
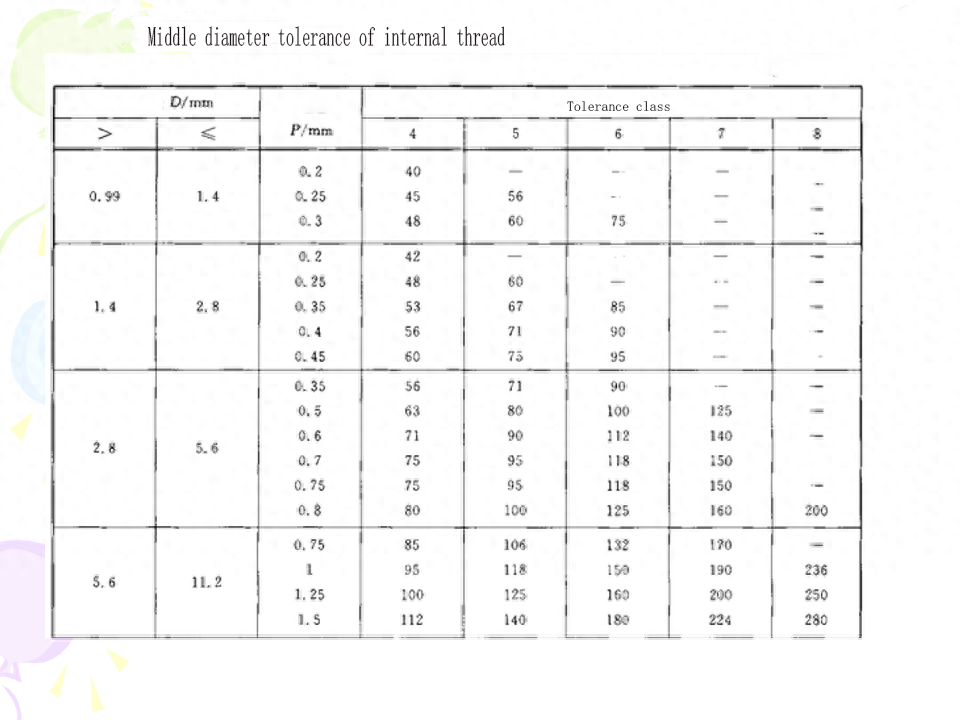
(3) Common thread tolerance level In the thread tolerance standard, the tolerances of d, d2 and D1, D2 are specified. Their respective tolerance levels are shown in Table 9-1. No tolerances are specified for pitch and tooth type (controlled by the middle diameter tolerance zone), and no tolerances are specified for small diameter d of external thread and large diameter D of internal thread.
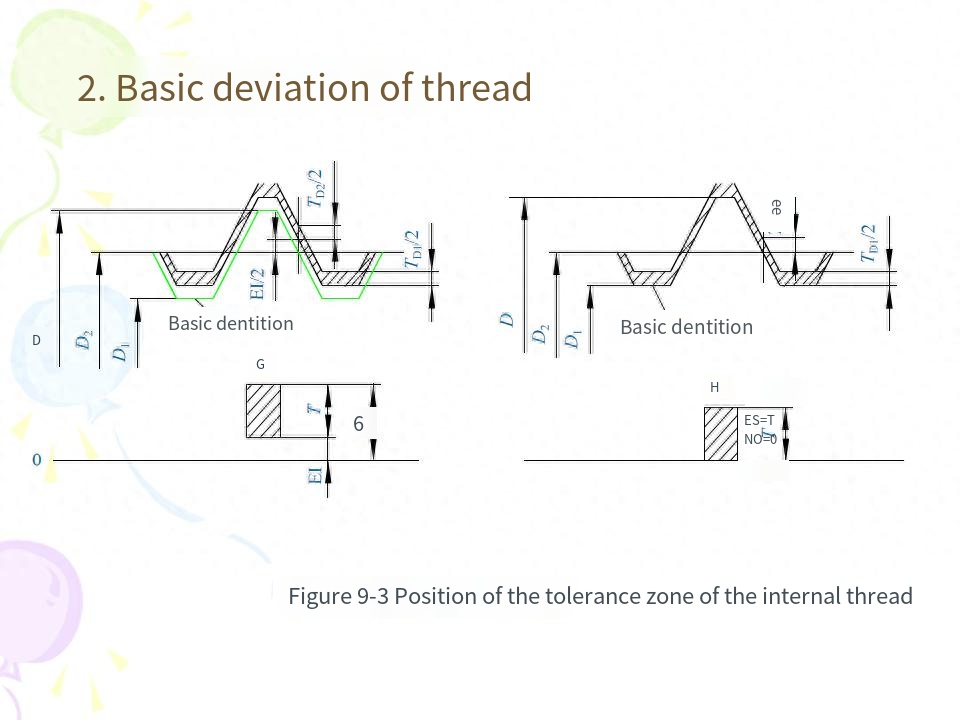
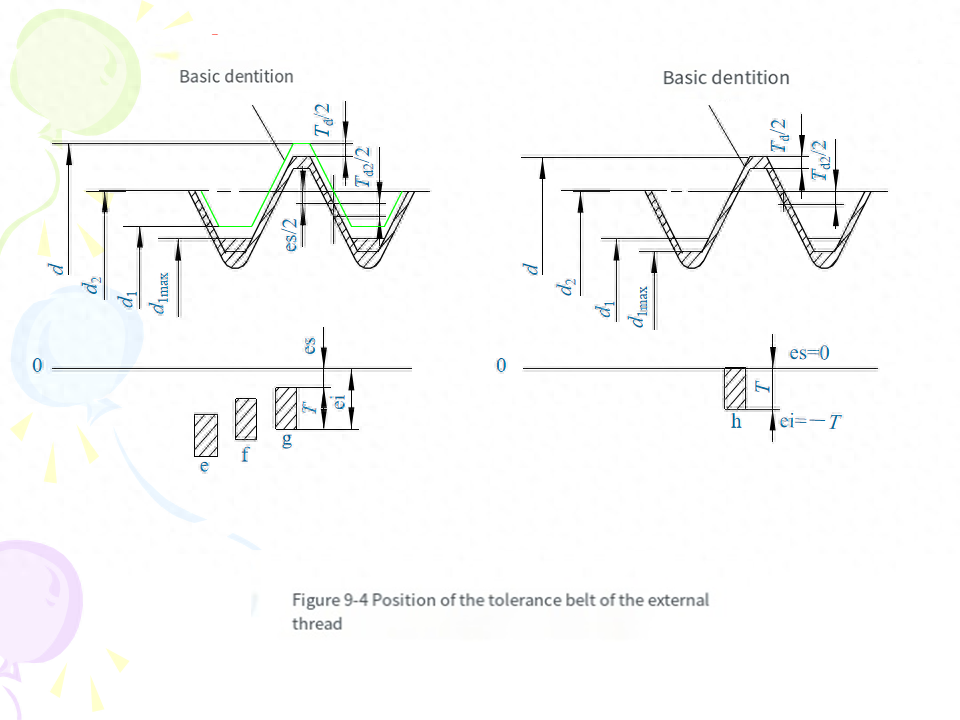
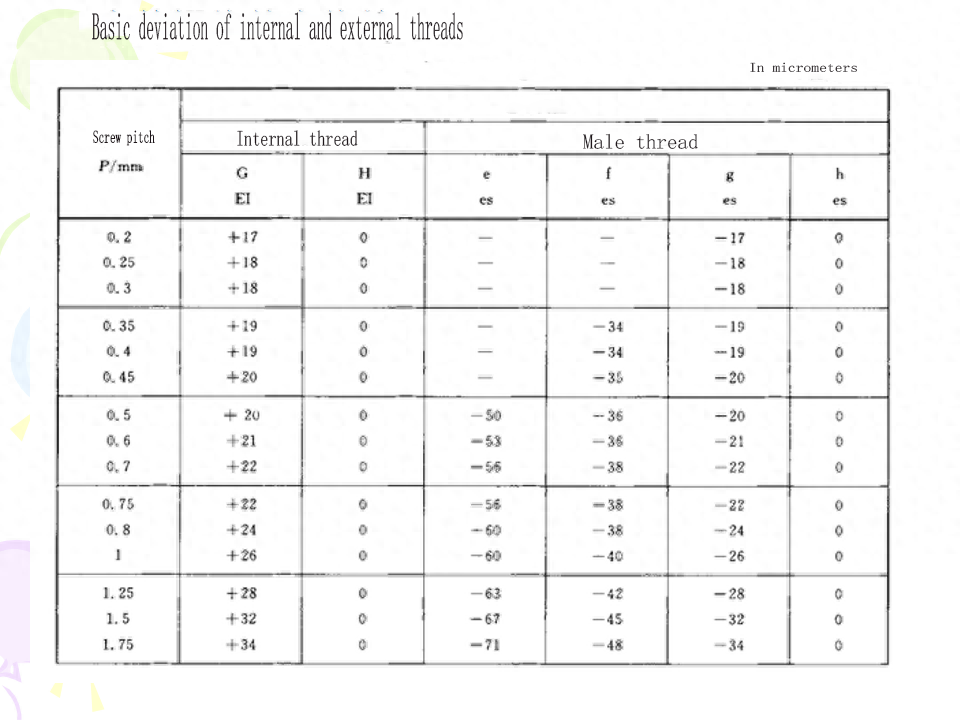
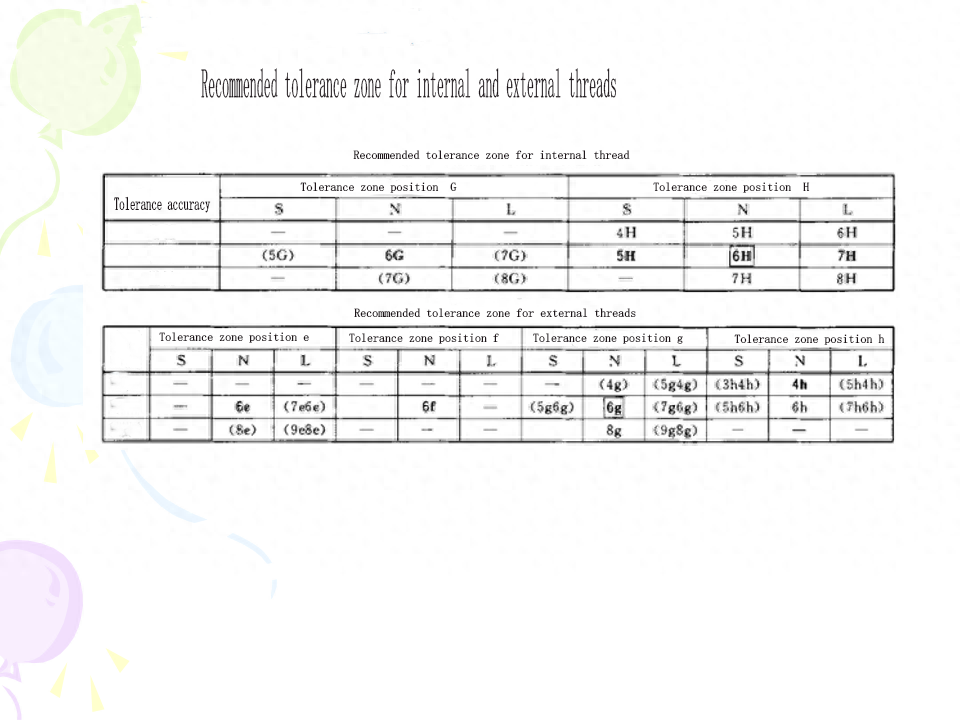
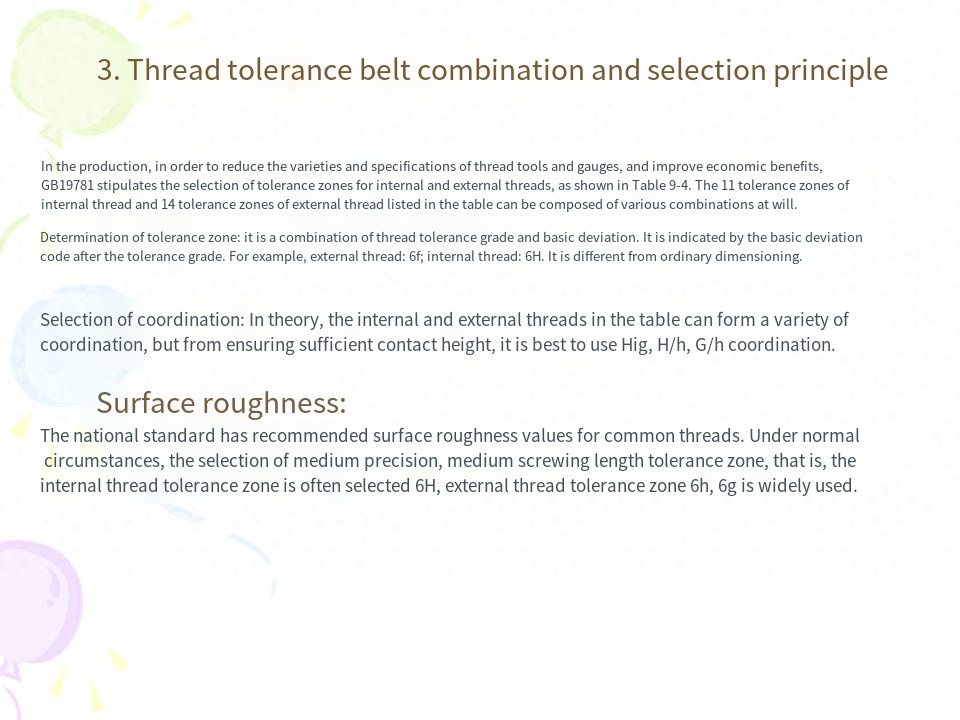
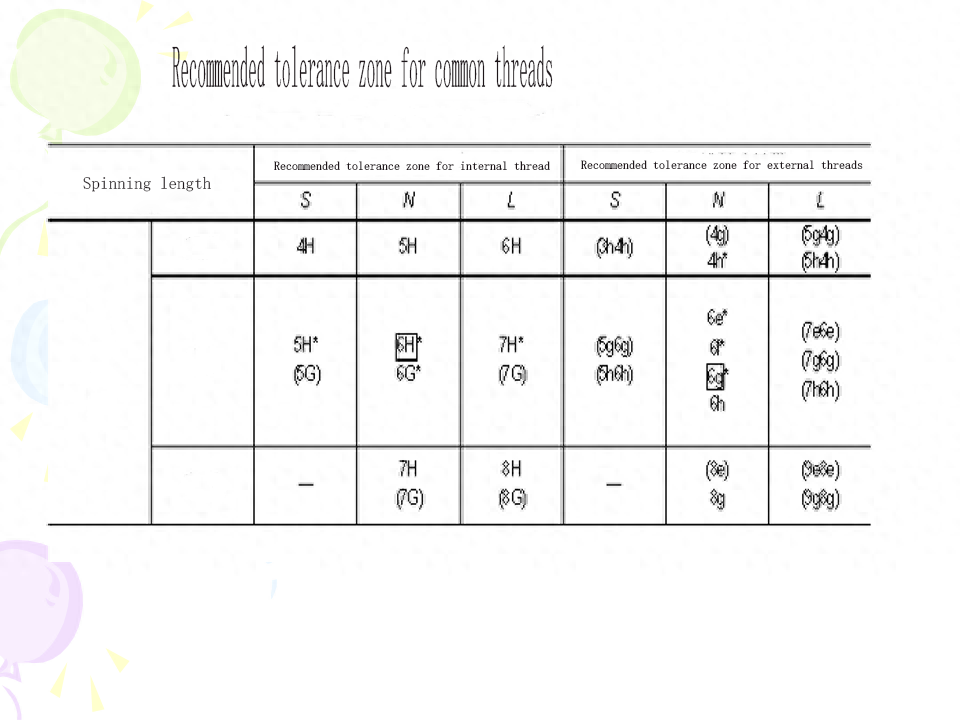
(4) Basic deviation For external threads, the basic deviation is the upper deviation (es), there are e, f, g, h four kinds; For internal threads, the basic deviation is the lower deviation (El), there are two kinds of G and H.The tolerance grade and the basic deviation constitute the thread tolerance zone. The national standard specifies the common tolerance zone, as shown in Table 9-4. In general, the preferred tolerance zone specified in the table should be selected as far as possible. The selection of tolerance zones is described in this chapter.
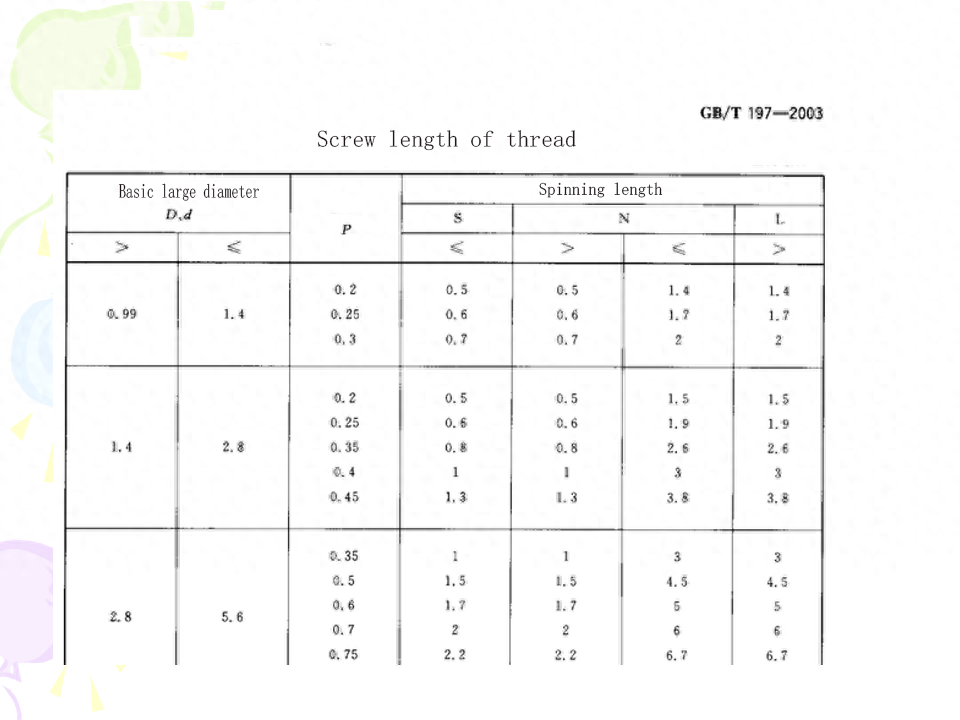
(5) Screw length and precision gradeThe screw screw length is divided into three types: short, medium and long, denoted by code S, N and L, respectively. The values are shown in Table 9-5When the tolerance level of the thread is fixed, the longer the screw length, the higher the cumulative pitch deviation and the tooth half Angle deviation may be. Therefore, the thread according to the tolerance level and the length of the screw has three precision levels: precision, medium and rough. The application of each precision level is described in this chapter. With the same accuracy level, the tolerance level of the thread should be reduced with the increase of the spinning length (see Table 9-4).
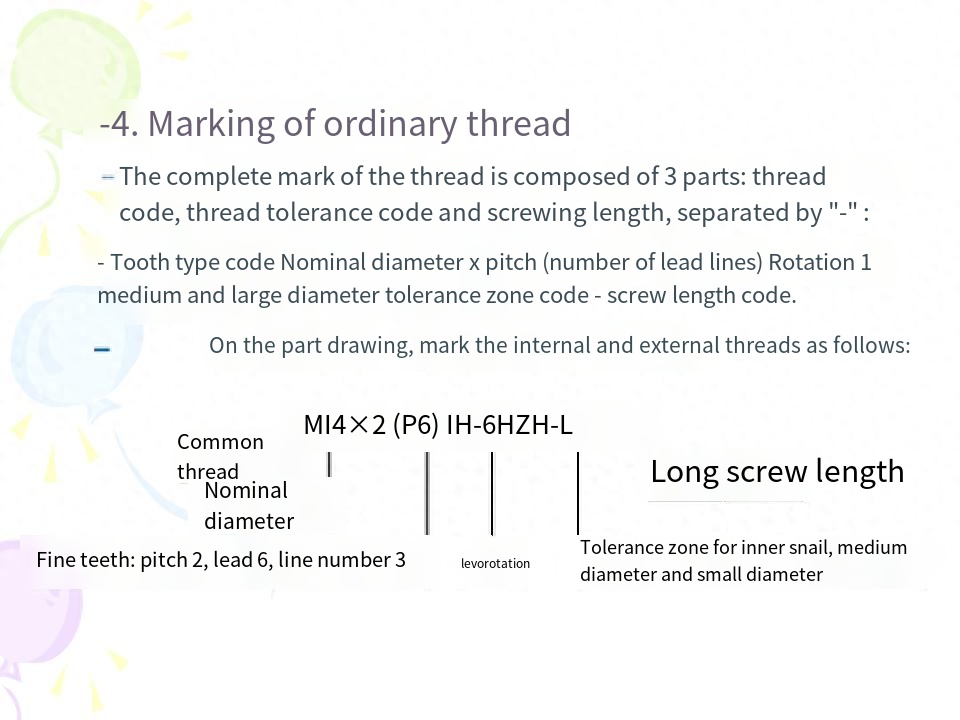
(6) The marking of threads on the drawing is shown in the relevant contents of this chapter.
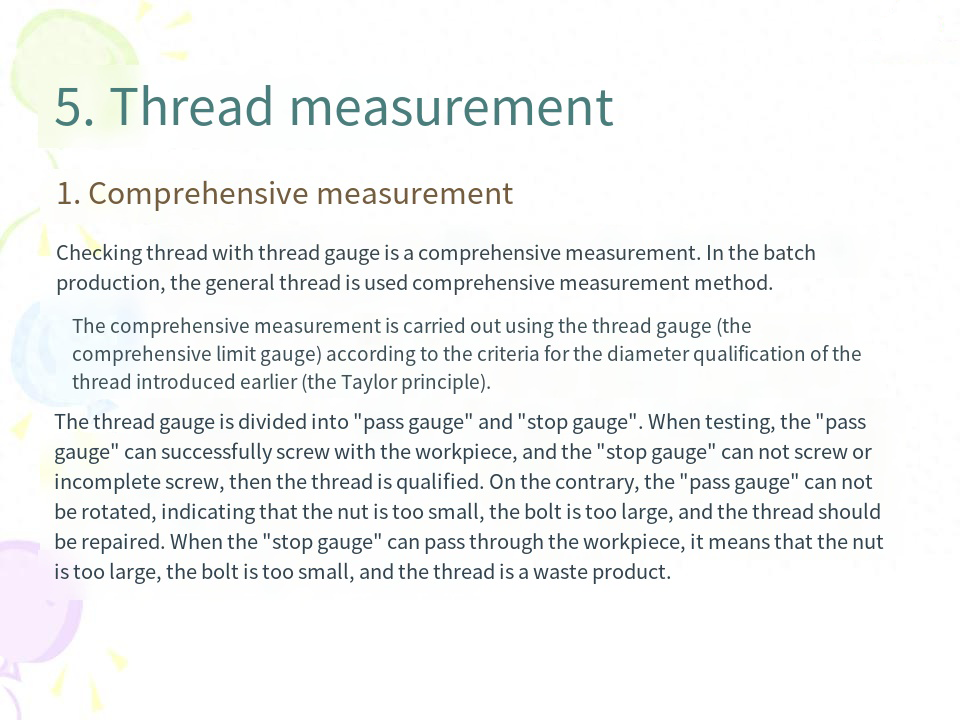
(7) The detection of threads is divided into comprehensive detection and single detection.
Post time: Sep-22-2023

